

iPhone 16 Pro Screen Replacement Manual
August 8, 2026
iPhone 16e Screen Replacement Manual
August 9, 2026

← Apple repair manuals · All brands
iPhone 16 Pro Max Screen Replacement Manual
This FIX4U manual walks through iPhone 16 Pro Max screen replacement the way we approach it in our Rosedale workshop — based on the current public iFixit tear-down sequence, rewritten for customers and technicians. It includes a clear Install section (adhesive, reconnect, seat the new screen, and pentalobe screws).
Safety: drain battery below ~25% before opening. On iPhone 16-class devices the battery often cannot be disconnected first — avoid metal tools near connectors. Soften adhesive with controlled heat only.
Procedure adapted for FIX4U workshop use from the public iFixit iPhone 16 Pro Max Screen Replacement guide. Photos scrubbed of third-party logos. Not a substitute for trained technician work — book in-store for warranty-backed repair.
1) Prepare & open (disassembly)
1. Before you begin
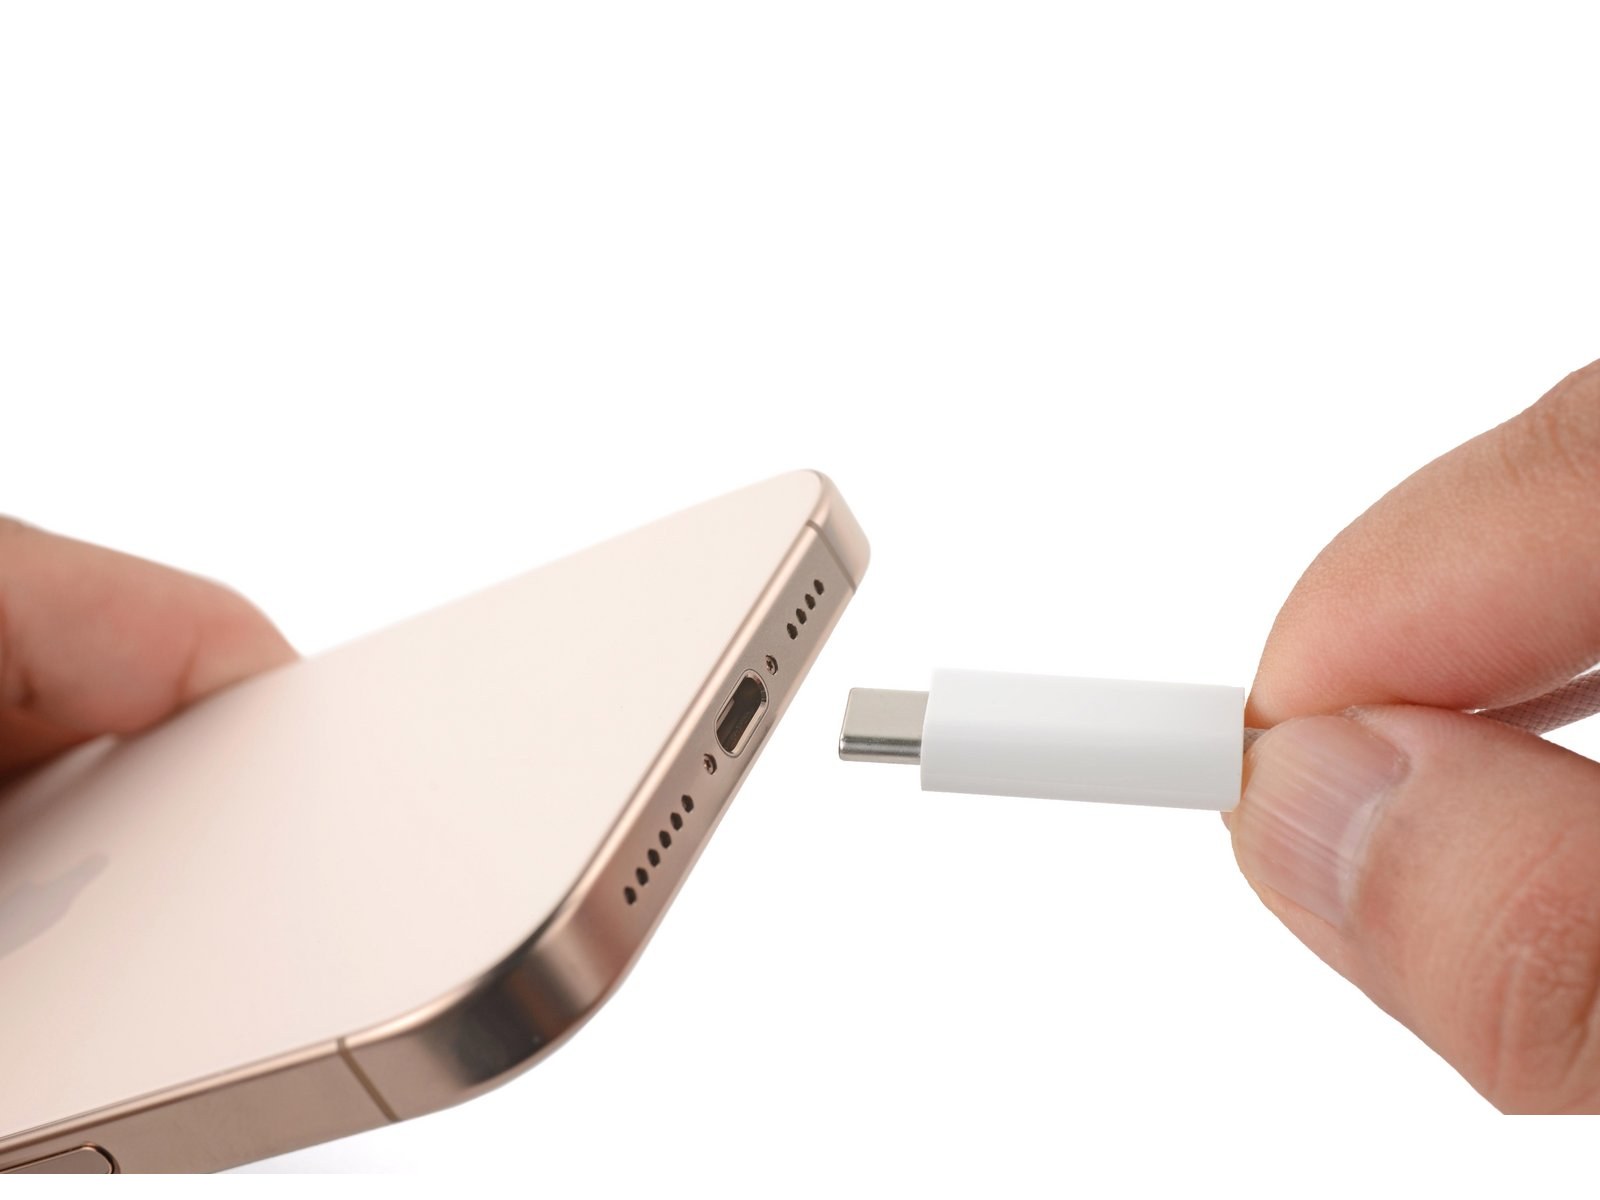
Allow the iPhone 16 Pro Max's battery to drain below 25%, as a charged lithium-ion battery is a potential safety hazard. Unplug any cables from the iPhone 16 Pro Max. Hold the power and either volume buttons, and slide to power off the iPhone 16 Pro Max.
2. Tape over any cracks
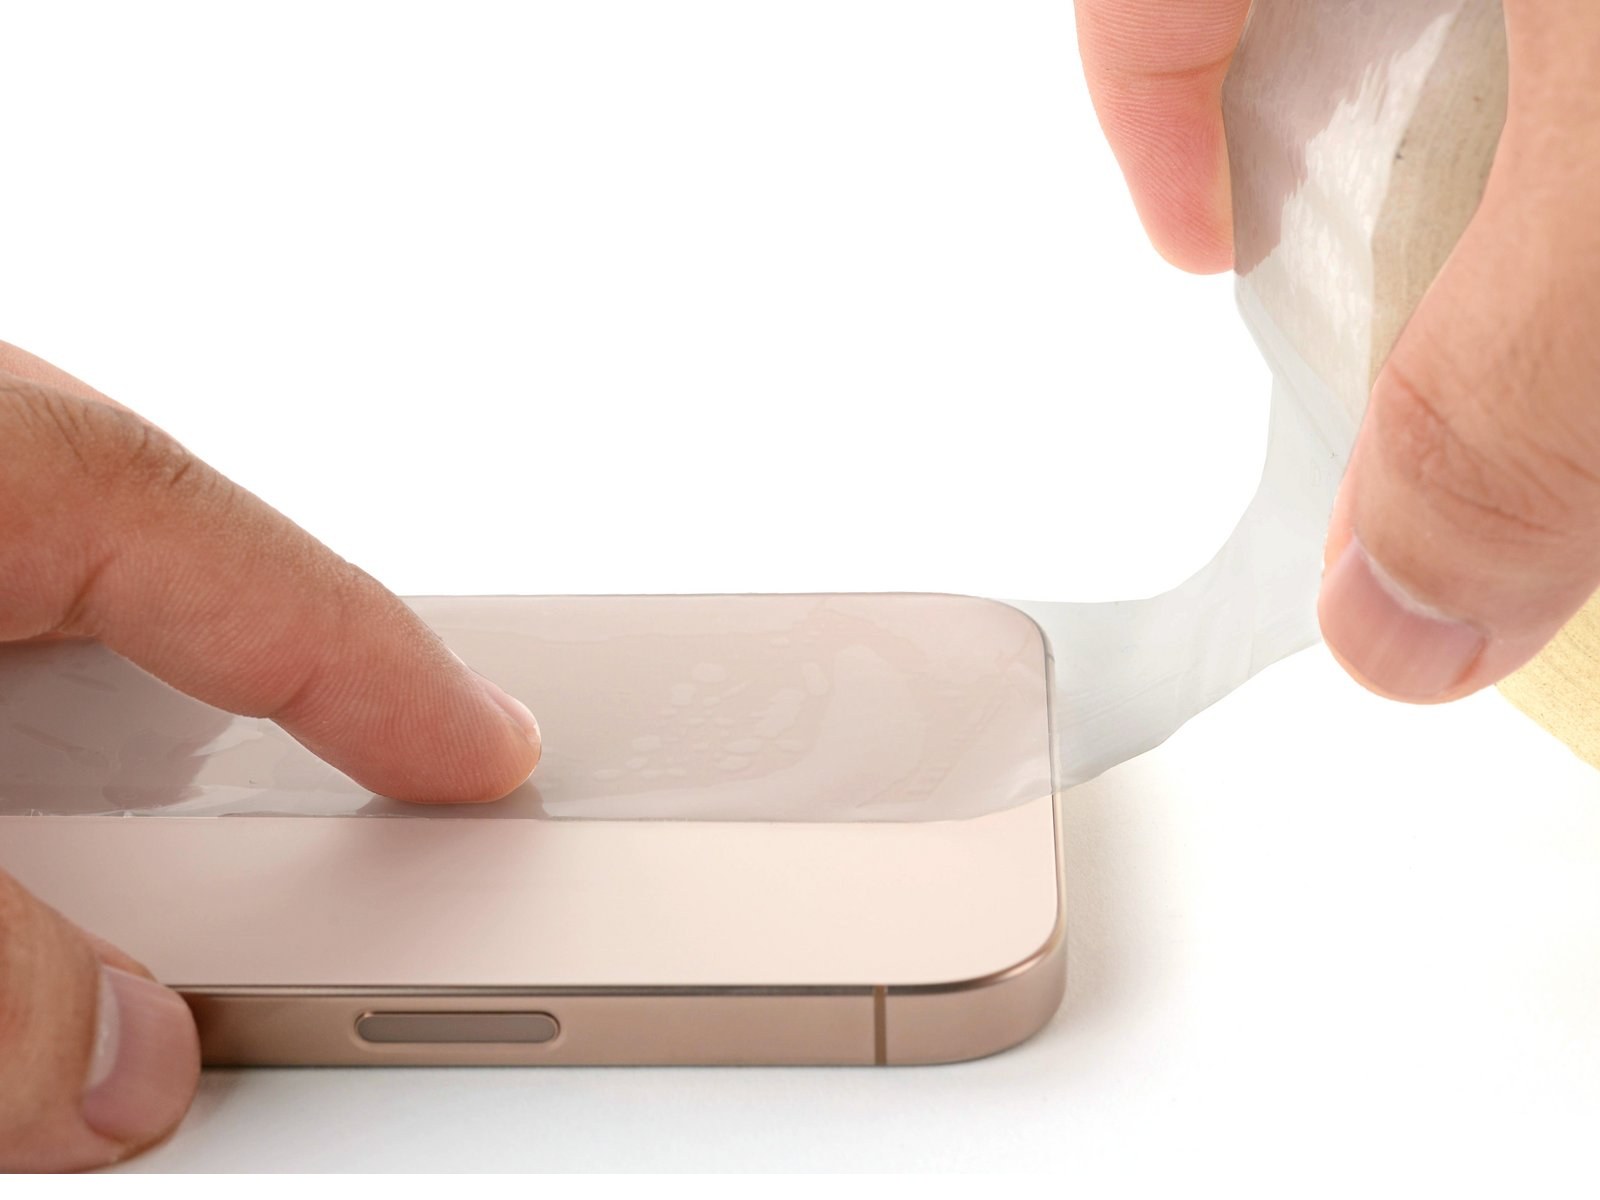
If your screen or back glass is badly cracked, lay overlapping strips of packing tape over the glass to protect yourself and make disassembly easier. Make sure there's a smooth area near the bottom edge that's big enough for a suction cup to stick to.
3. Remove the pentalobe screws
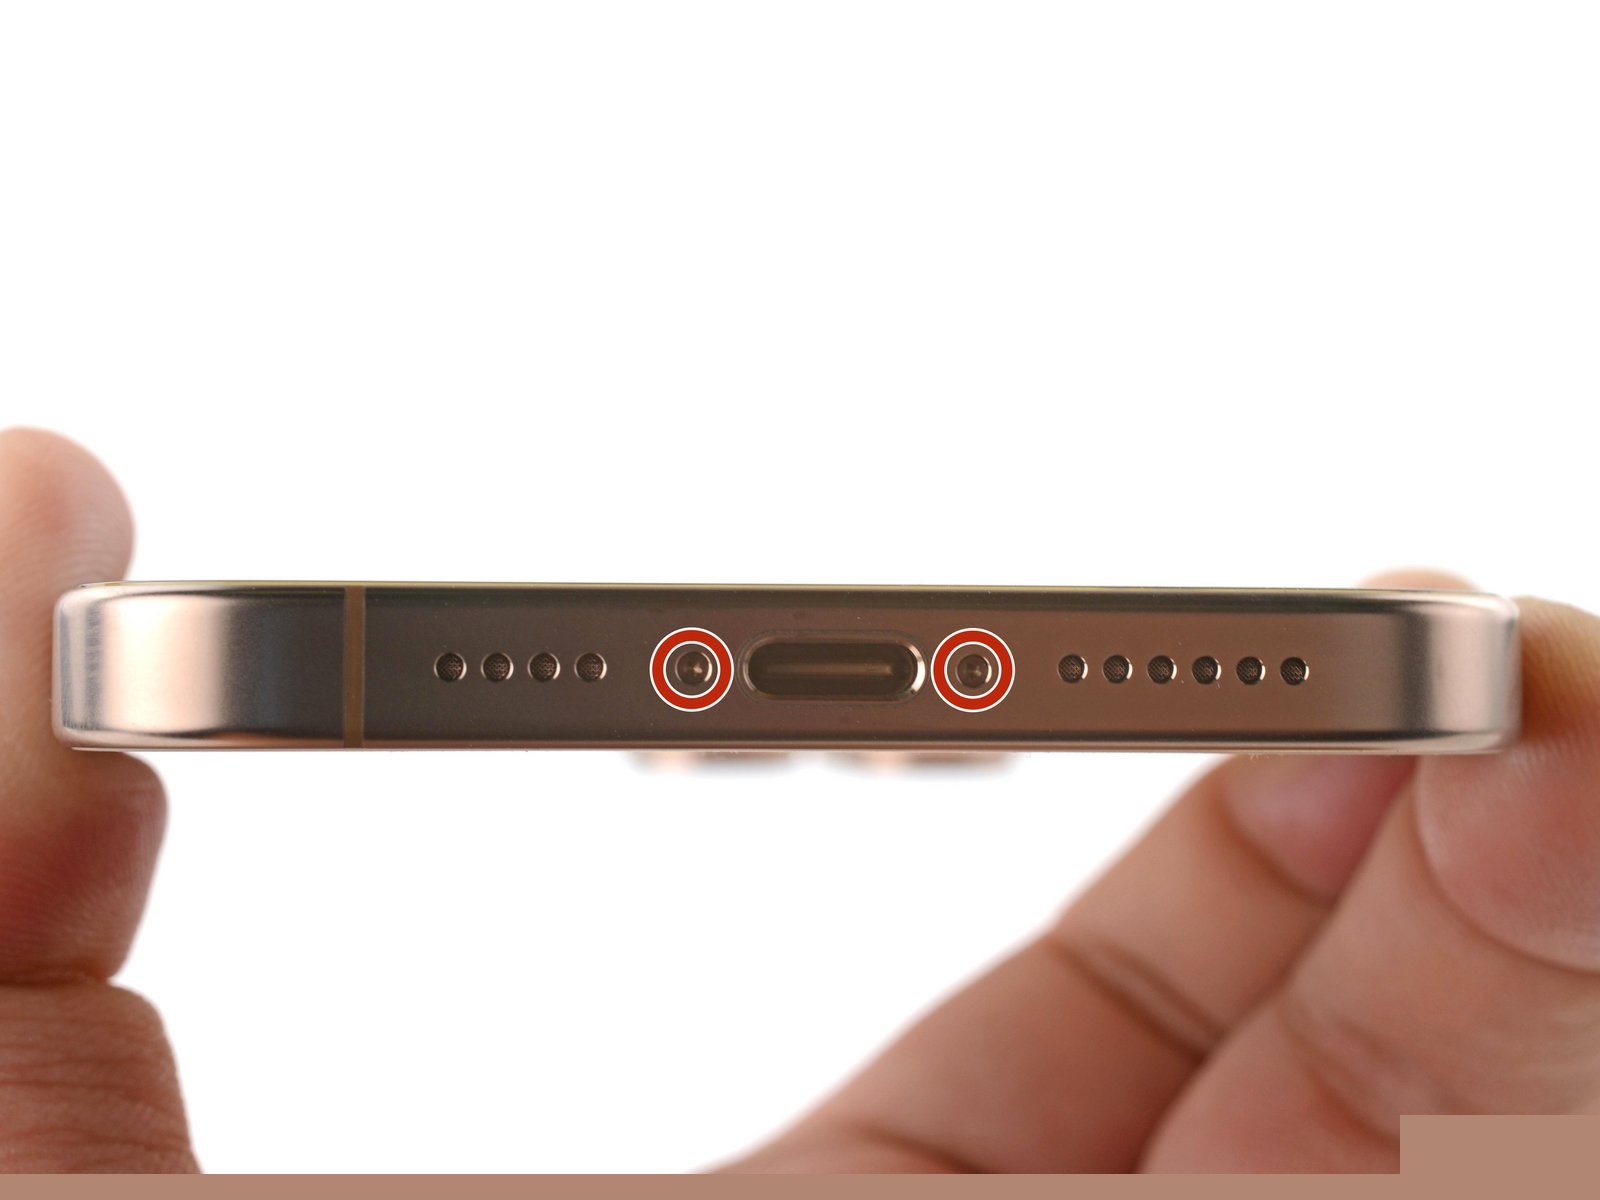
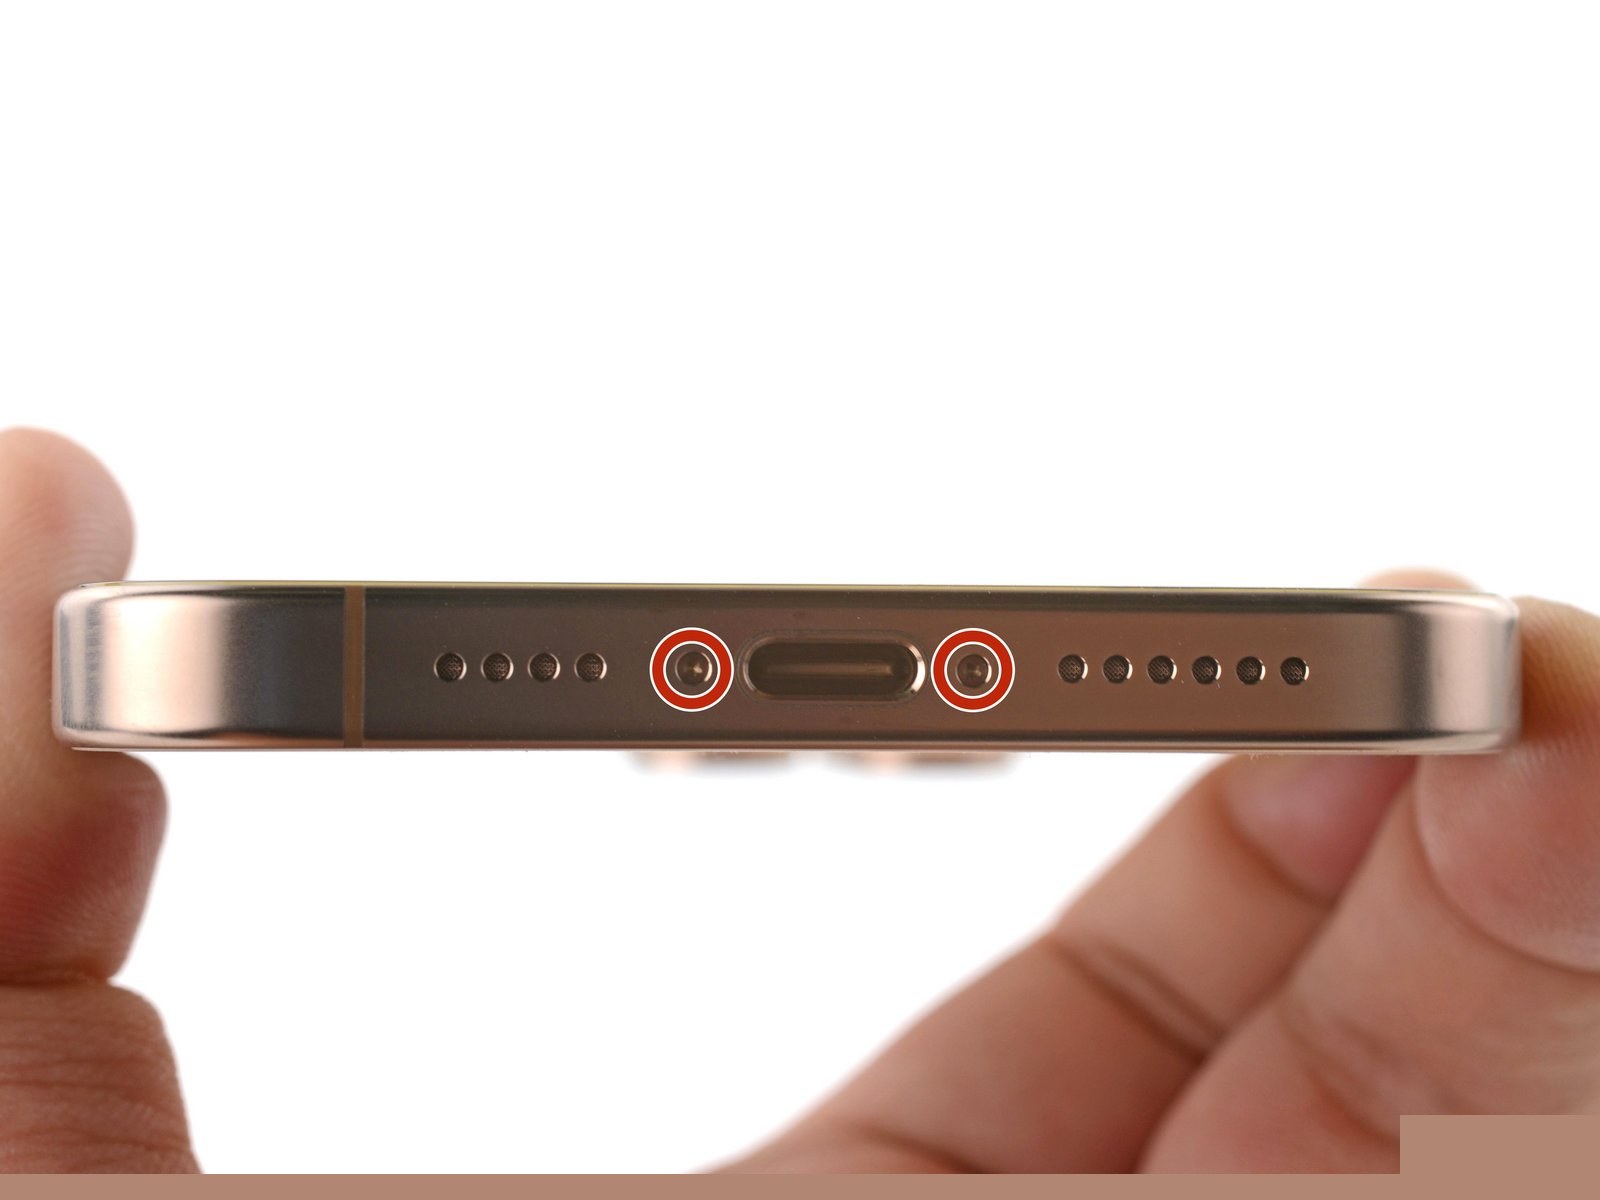
Use a P2 pentalobe driver to remove the two 7.4 mm-long screws on either side of the charge port.
4. Create a gap with a suction handle
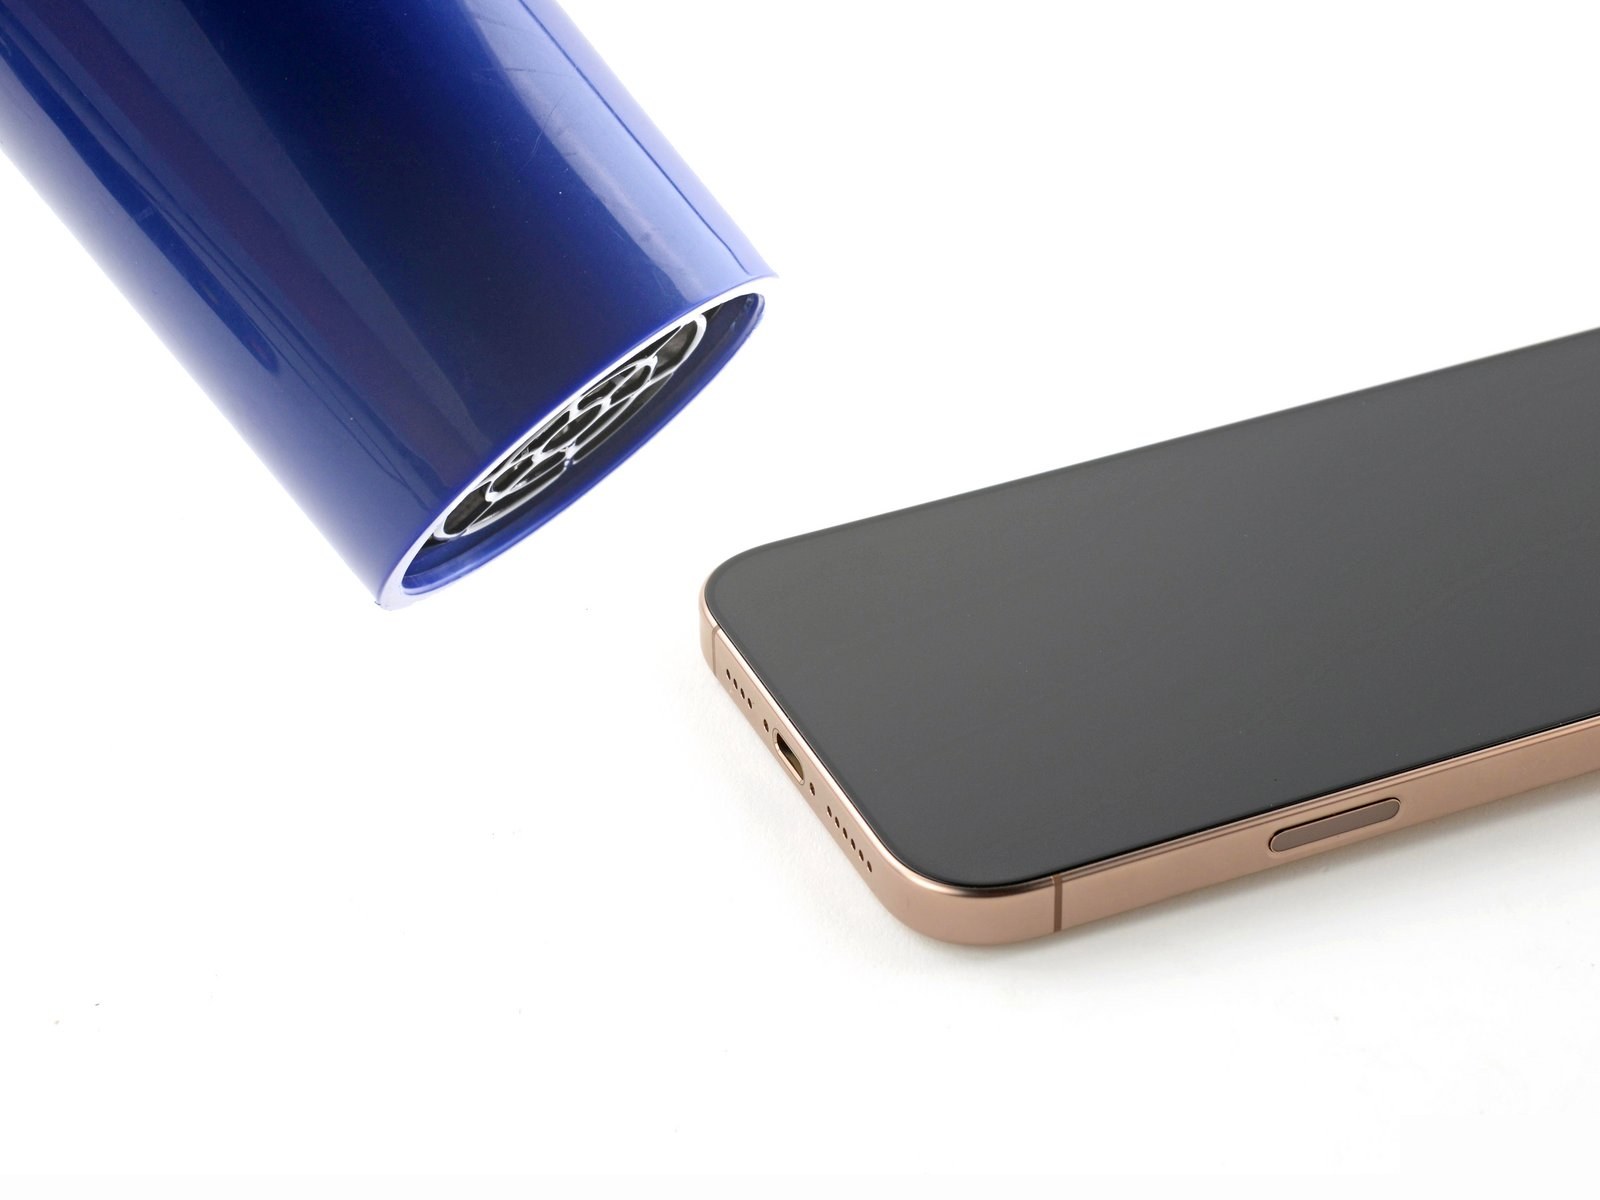
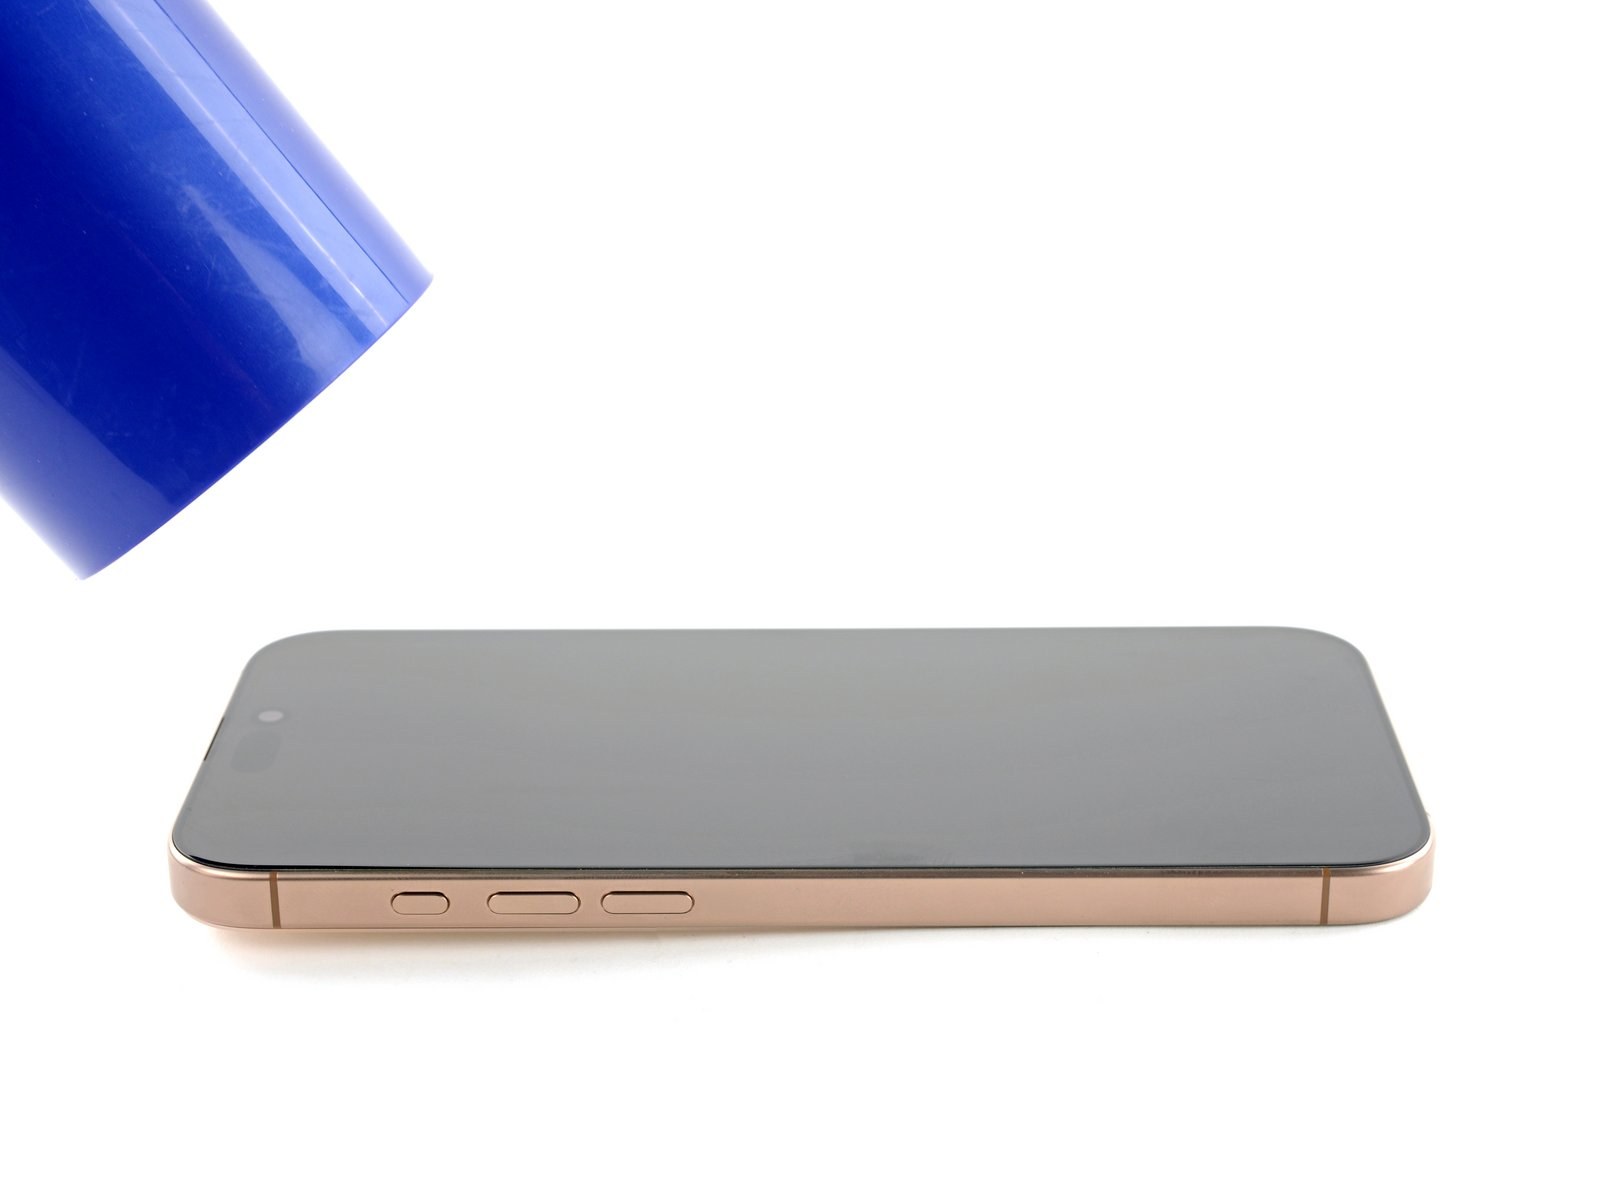
The next two steps show how to create an initial gap using a suction handle. Use a hair dryer or heat gun to heat the bottom edge of the screen until it's hot to the touch. You can also use an iOpener to heat the screen. Follow these instructions to heat and apply the iOpener properly.
6. Screen information
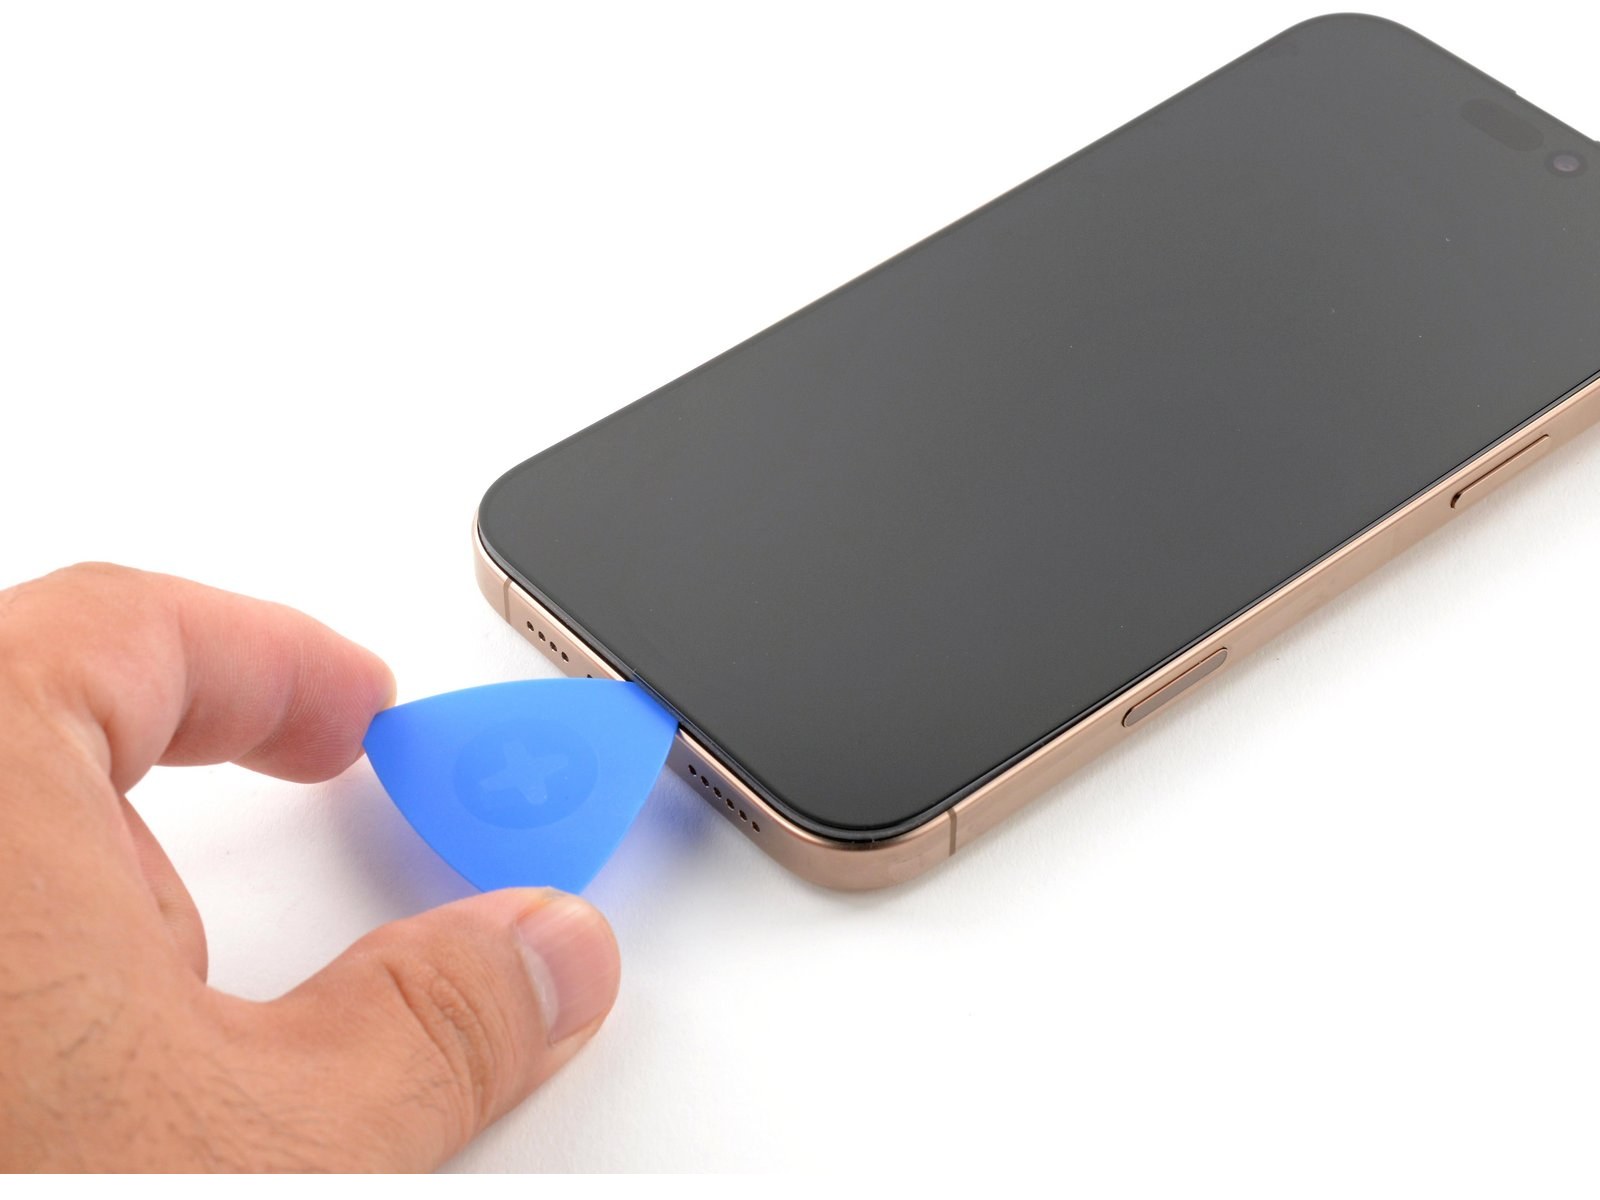
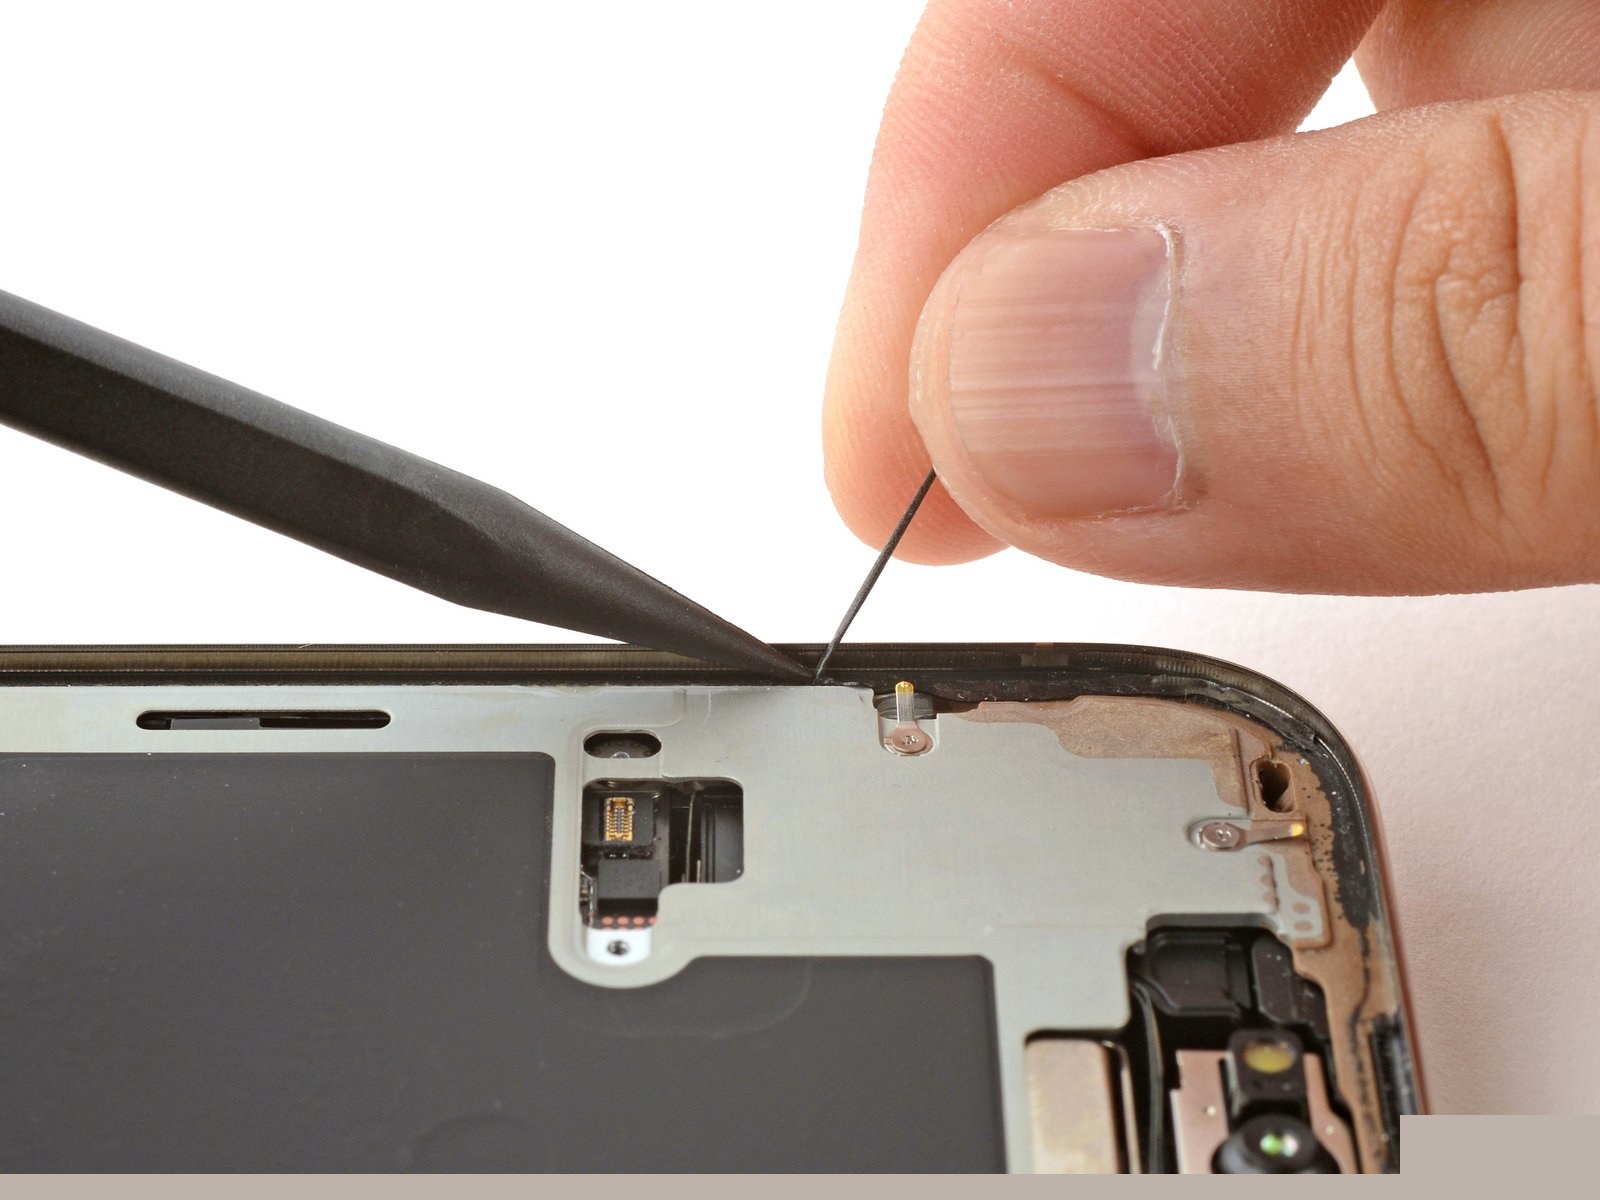
As you slice the adhesive securing the screen in the following steps, don't insert your pick deeper than 3 mm to avoid damaging the following areas: Two delicate cables connecting the screen to the iPhone—one just above the Action button and the other about halfway along the left edge of the iPhone Multiple spring contacts around the perimeter of the iPhone
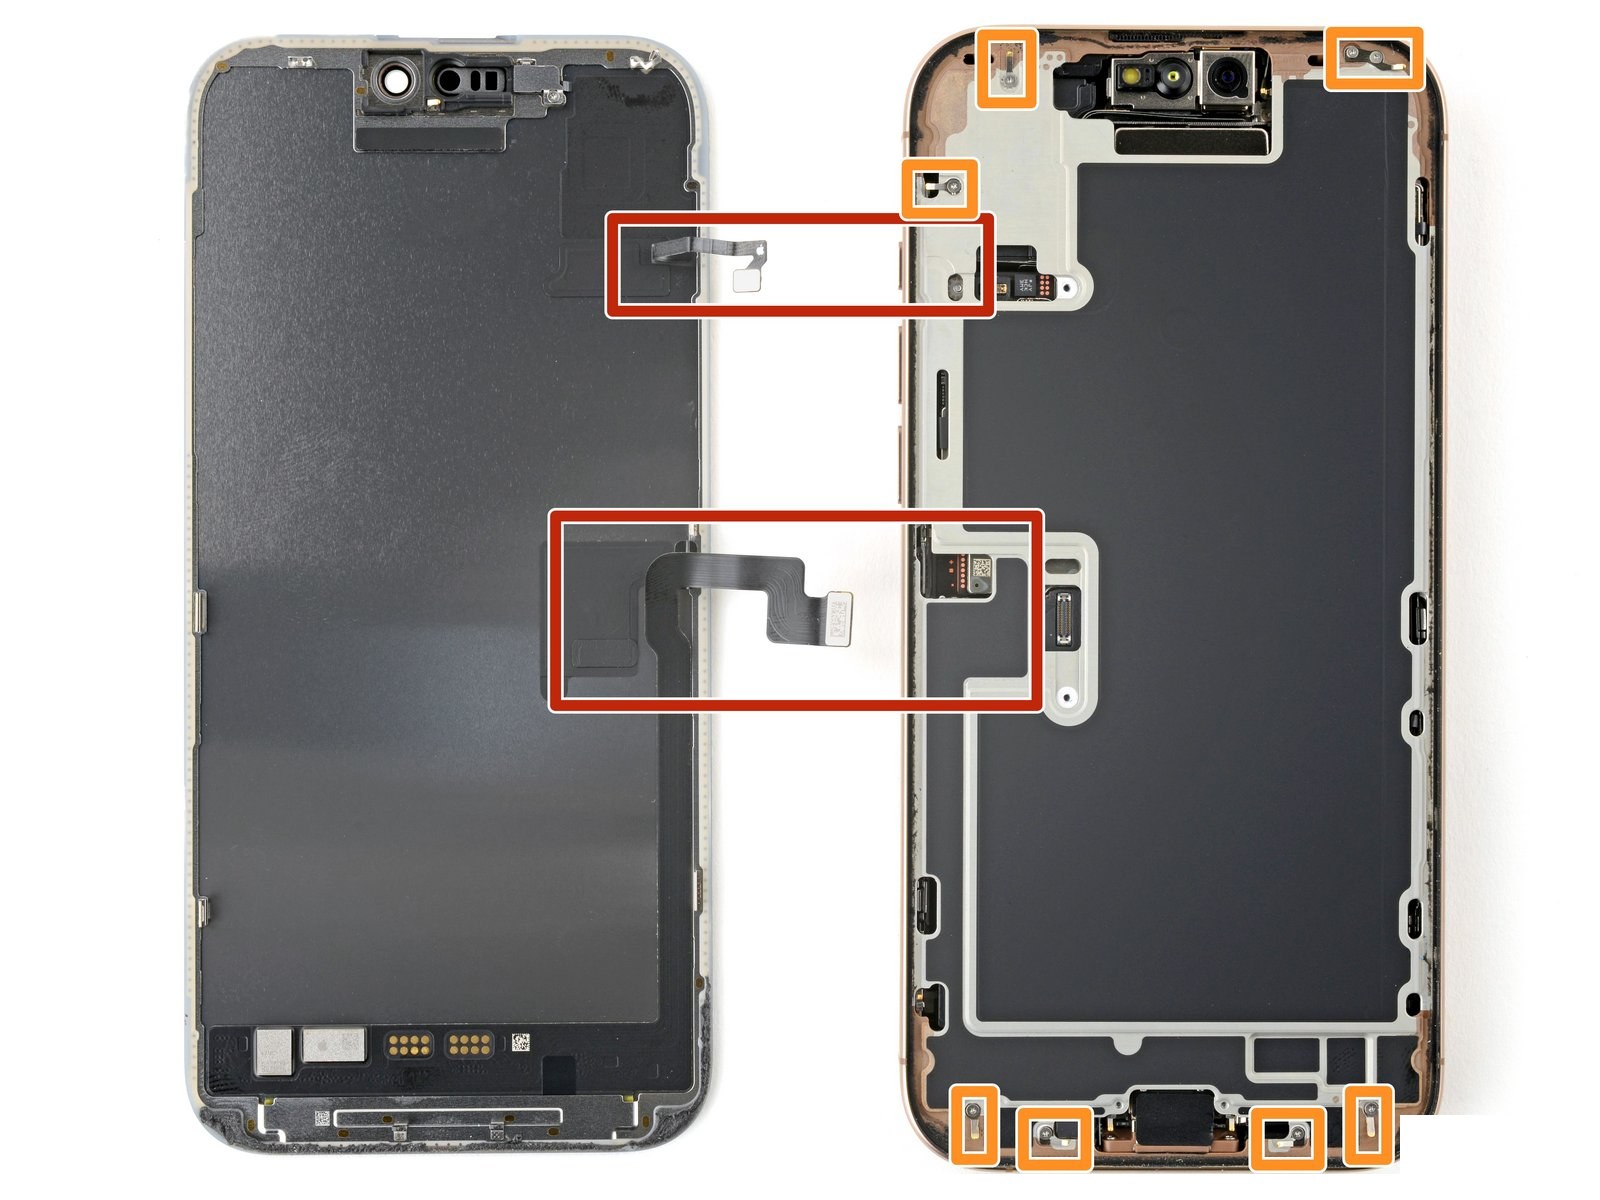
7. Swing open the screen
At this point, the screen should be free from the frame. If the screen feels stuck, go back around the perimeter with your pick and carefully check for missed sections of adhesive or stuck clips. Carefully lift the screen upwards until the clips along the long edges clear the frame. Swing open the screen over the left edge of the iPhone and lay it flat on your work surface.
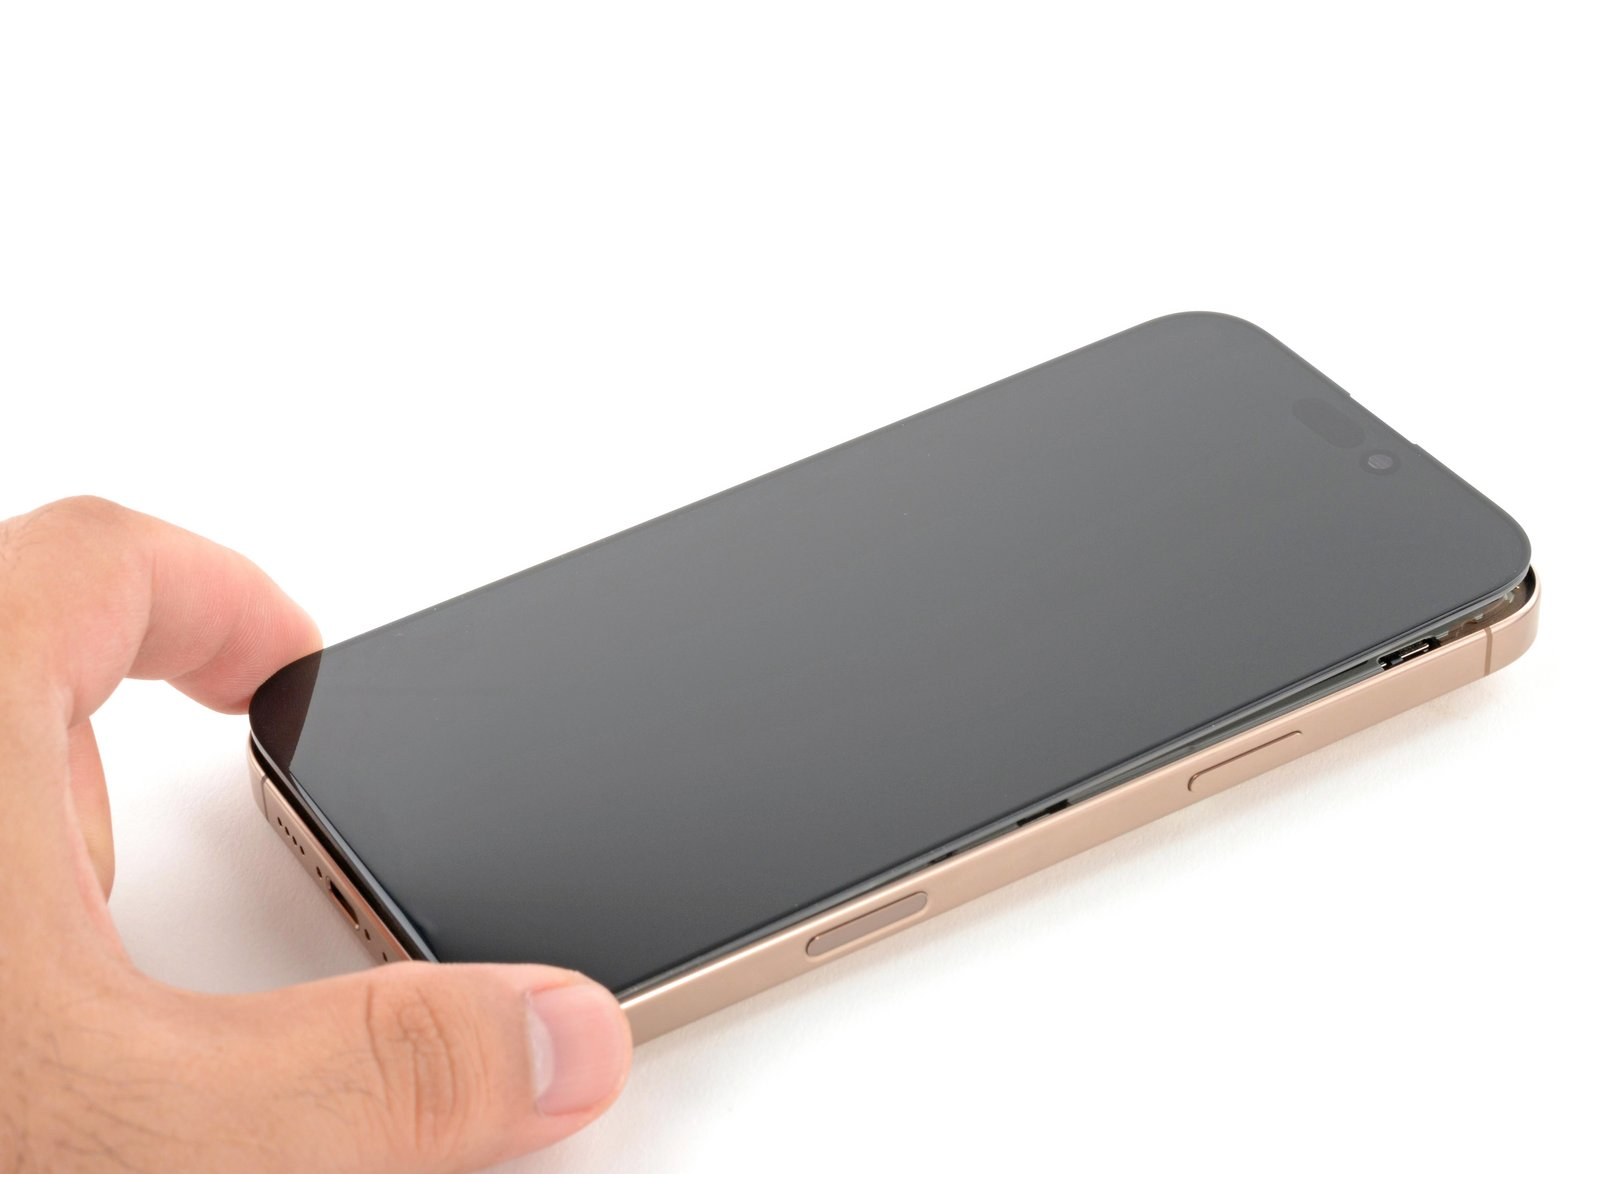
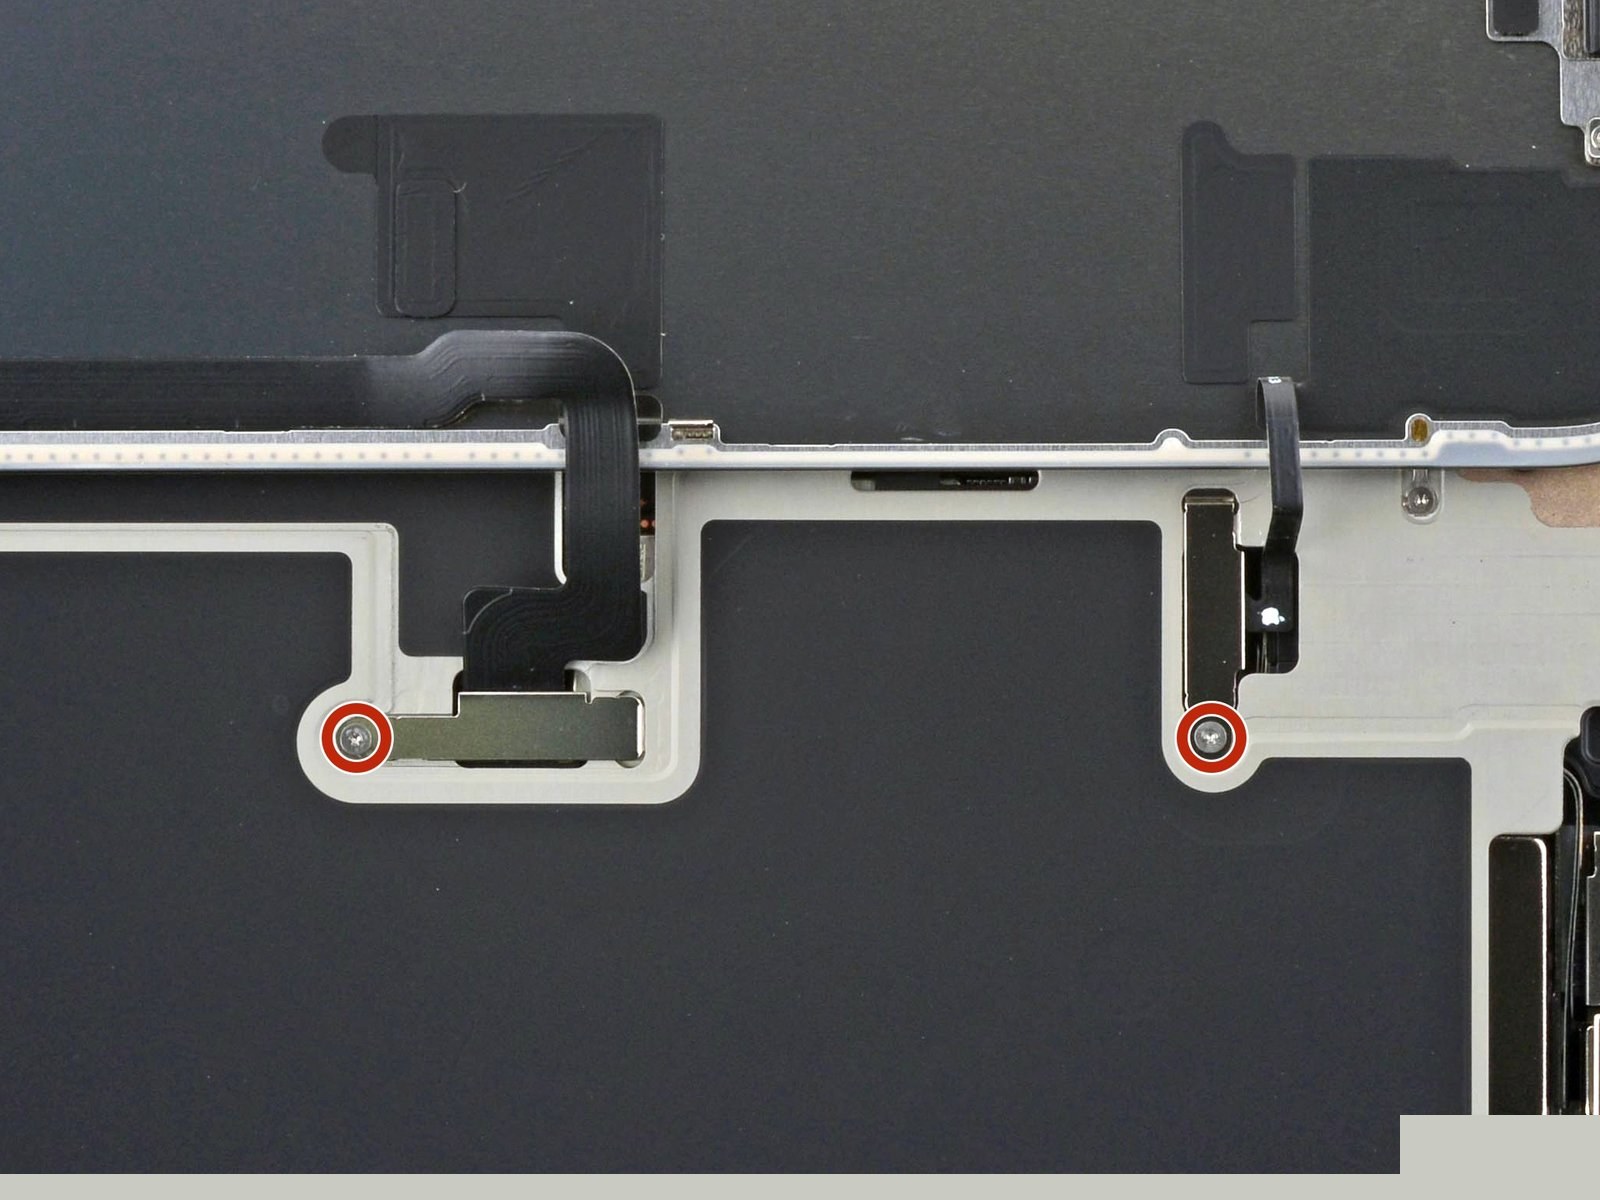
8. Remove the connector covers
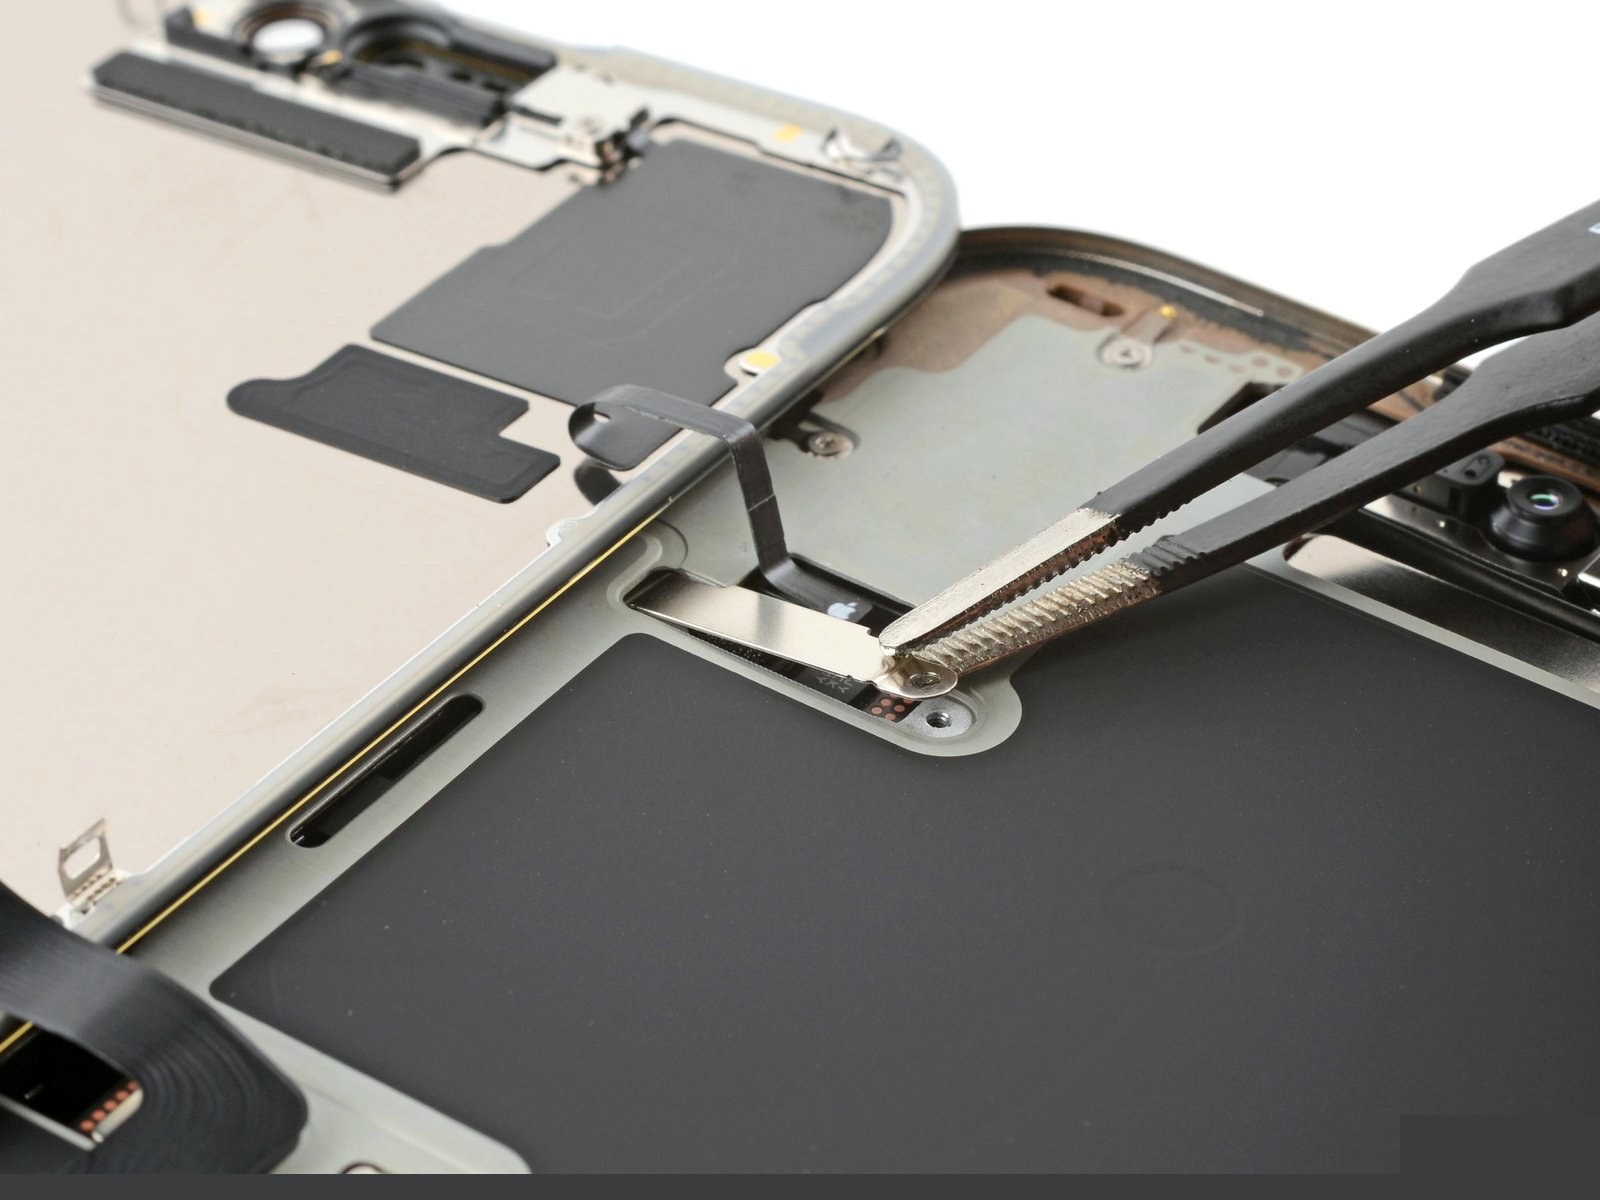
Use a tri-point Y000 driver to remove the two 1.3 mm‑long screws securing the front sensor and display connector covers.
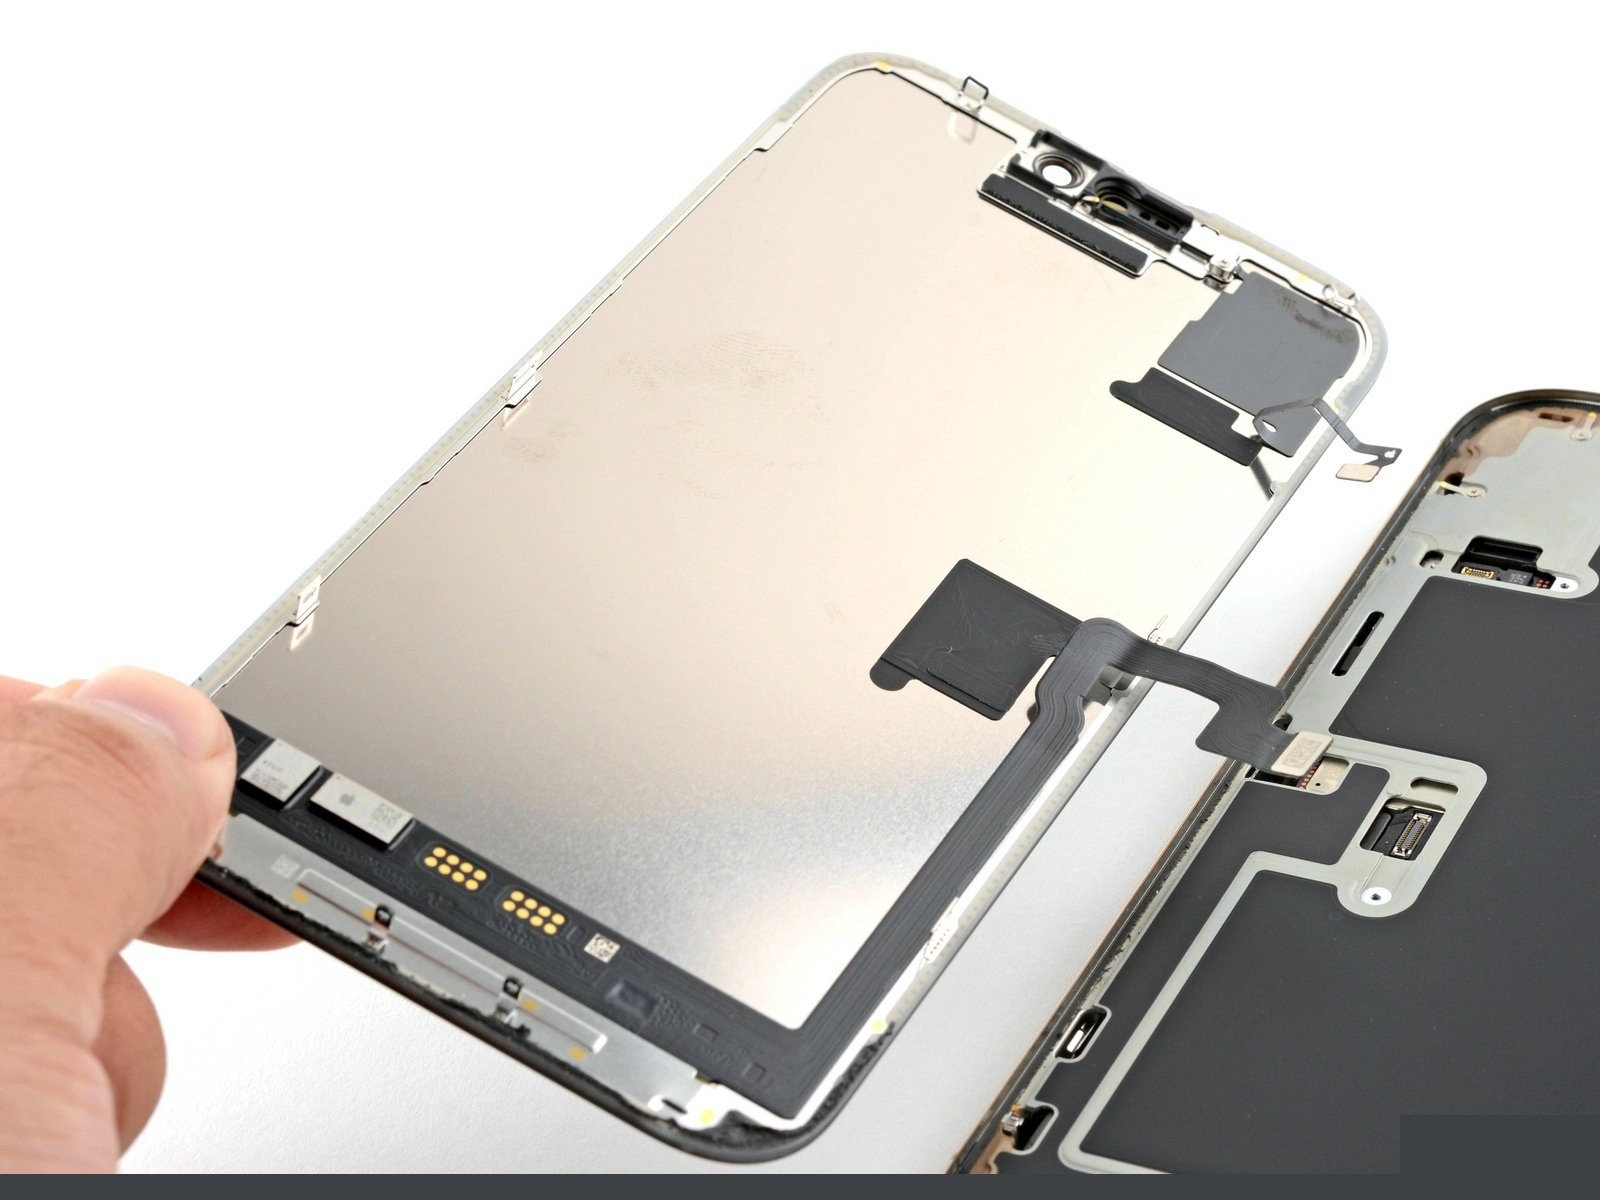
10. Remove the screen
Lift the screen and remove it.
11. Step 11
Use tweezers to grasp the front sensor connector cover near the screw hole. Lift and remove the cover. Repeat the procedure to remove the display connector cover.
17. Apply heat to the perimeter
Use a hair dryer, heat gun, or an iOpener to heat the screen perimeter until it's slightly too hot to touch. The heat softens the adhesive and helps create a better bond.
2) Transfer parts to the new screen
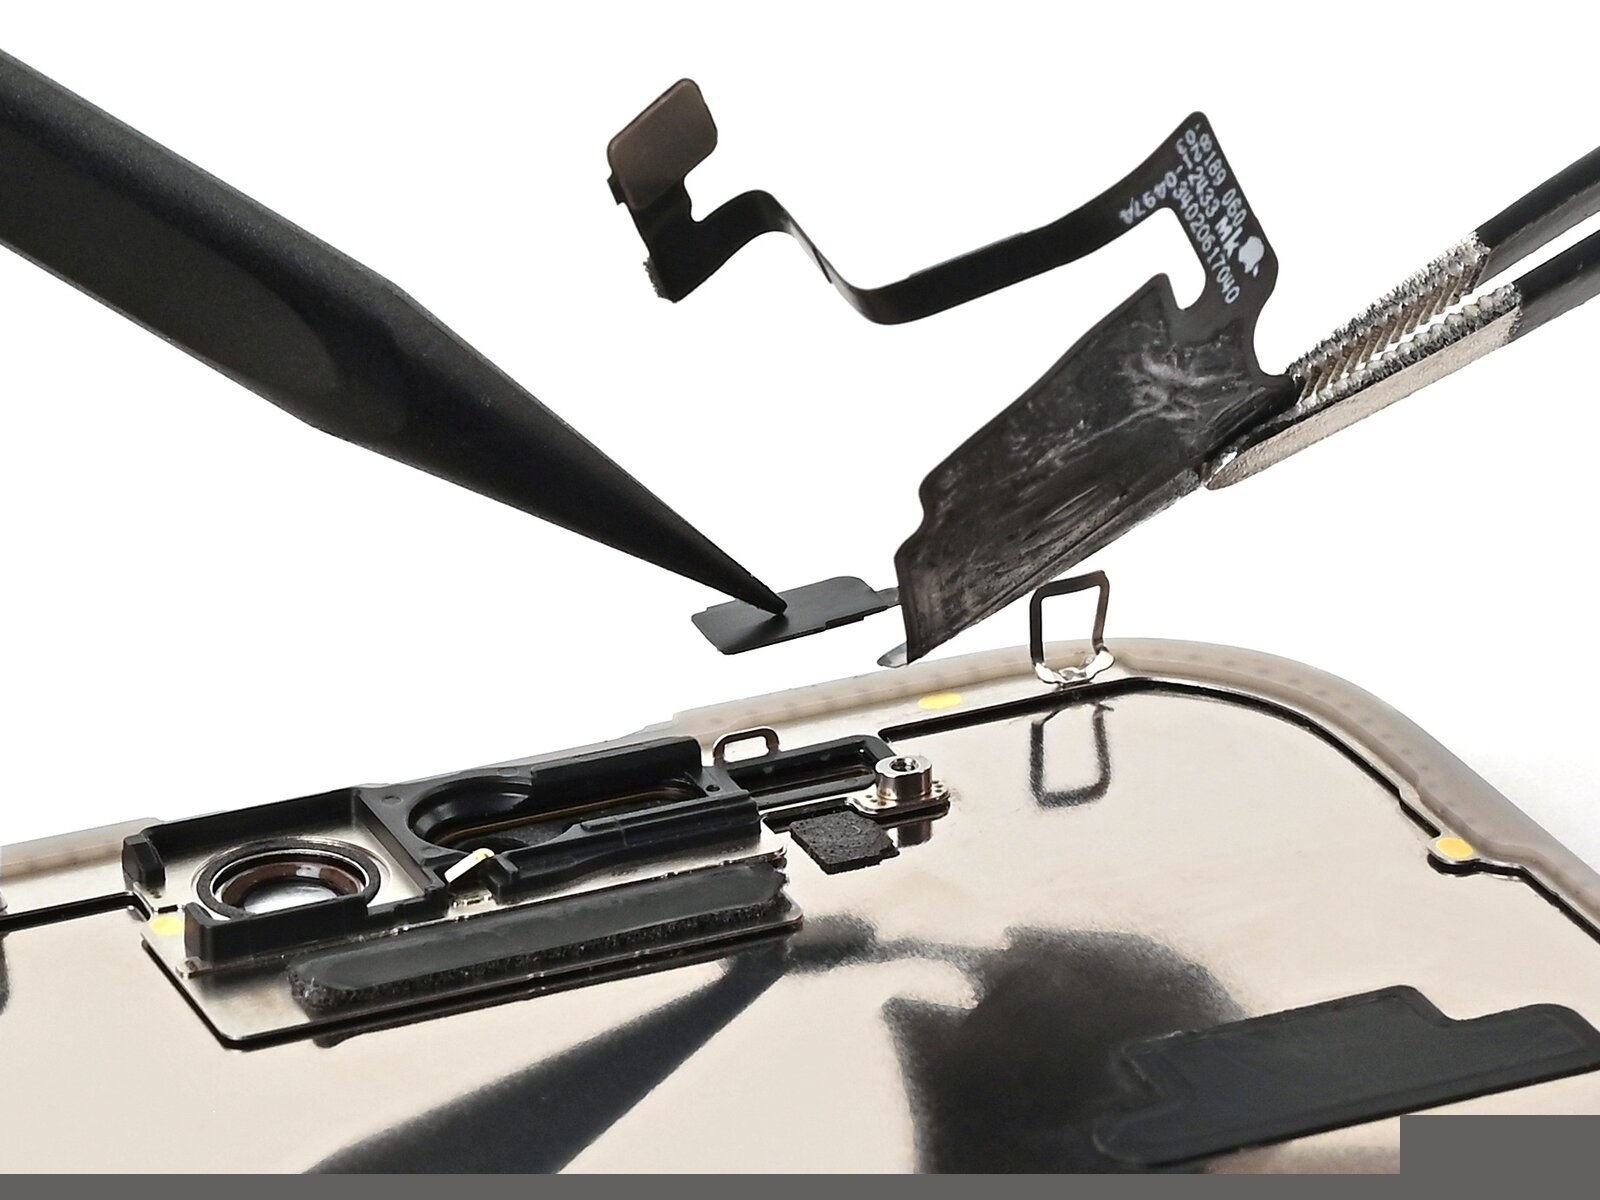
Move the ambient light / front sensor hardware from the old assembly to the new iPhone 16 Pro Max screen when the replacement part requires it.
12. Place the ambient light sensor
Align the ambient light sensor with its recess in the back of the screen. Use a spudger or your finger to press the ambient light sensor into its recess.
3) Install the new screen
This is the installation phase: clean old adhesive, apply new waterproofing adhesive, reconnect display flexes, test, then seat and screw the iPhone 16 Pro Max screen.
5. Slice the bottom edge adhesive
Slide the opening pick along the bottom edge to release the adhesive. Don't insert the pick deeper than 3 mm to avoid damaging the spring contacts. If the adhesive feels difficult to slice, reheat the edge for a minute. Leave the opening pick in the bottom-left corner to prevent the adhesive from resealing.
9. Disconnect the screen
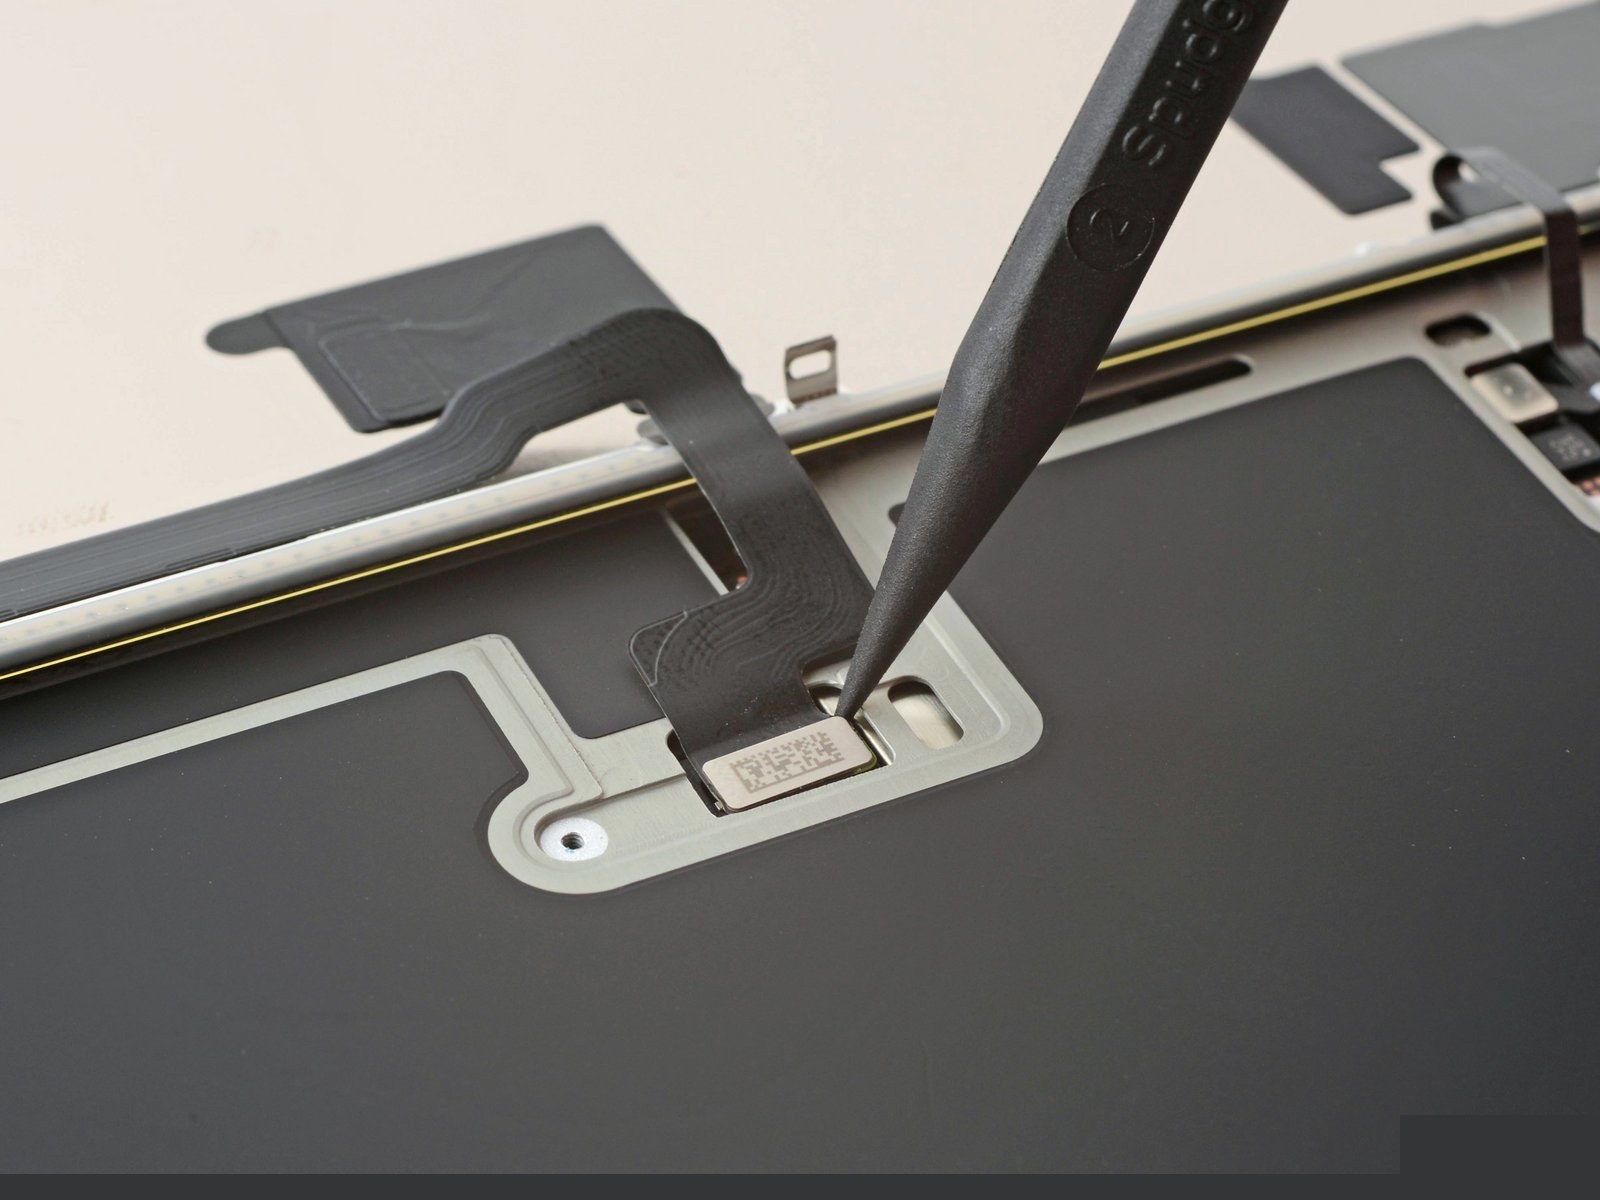
Use the tip of a spudger to pry up and disconnect the display press connector. Repeat for the front sensor press connector.
13. Remove the adhesive and its residue
Use a spudger or tweezers to remove the adhesive chunks from the iPhone's frame. Work around the fragile grounding clips. If you bend one out of place, gently bend it back with your fingers or tweezers.
14. Apply the replacement adhesive
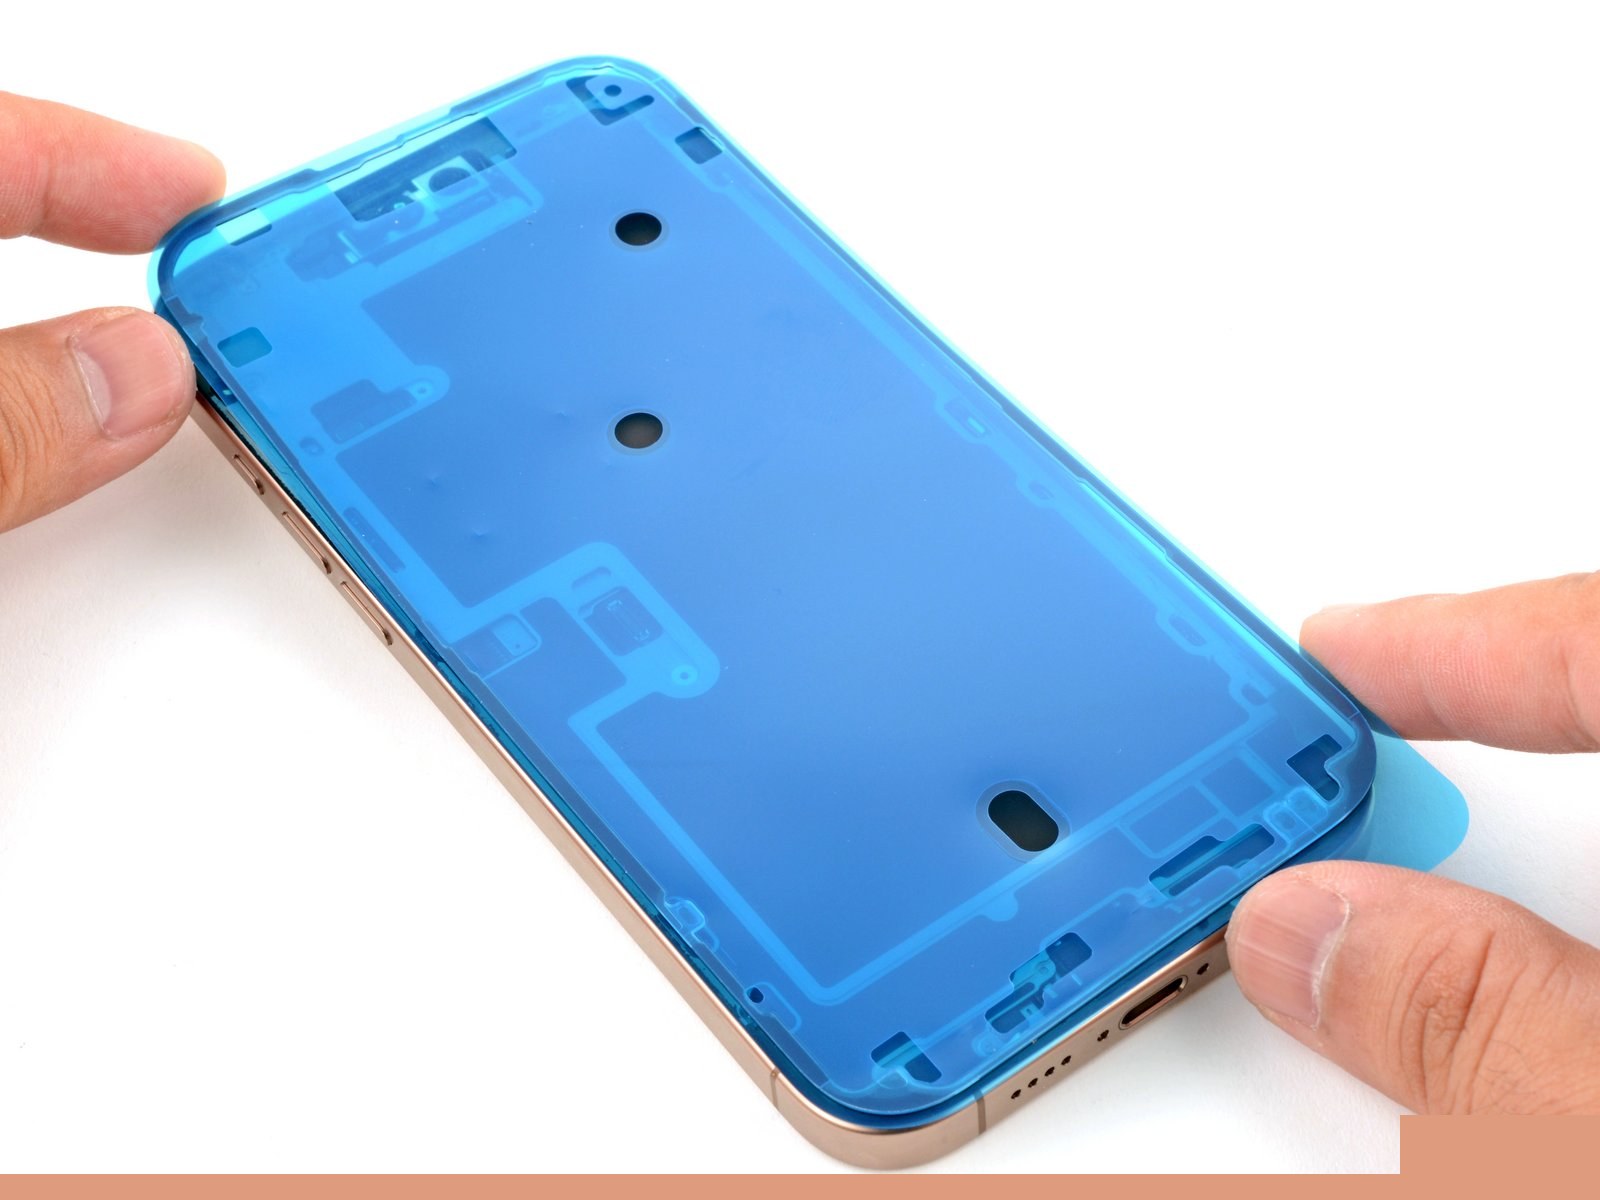
Lay the adhesive sheet over the frame to determine its proper orientation. Use features such as the camera cutout to visualize how the adhesive will lay in the frame.
15. Reconnect the screen
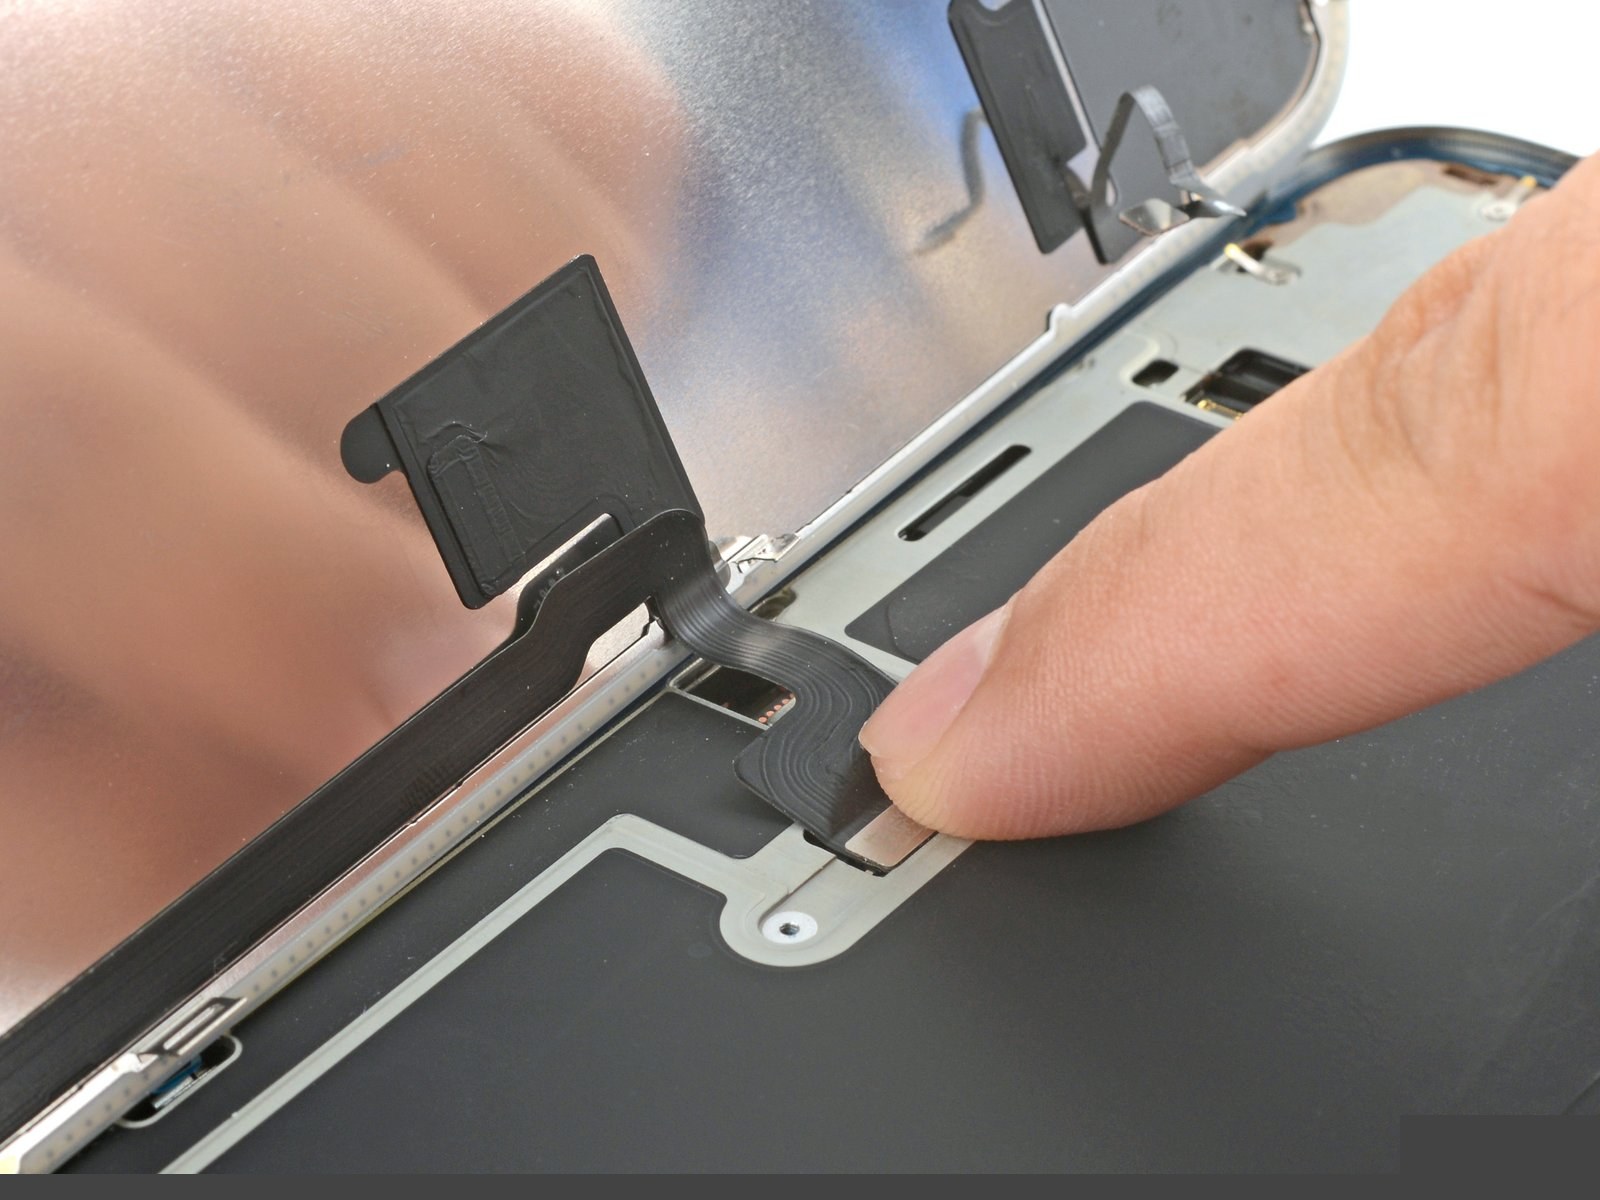
Use your finger to press down and connect the display connector. To re-attach wide press connectors like this one, carefully align and press down on one side until it clicks into place, then repeat on the other side. Don't press down in the middle. If the connector is misaligned, the pins can bend, causing permanent damage. Press down and connect the front sensor connector. Align the connector carefully over its socket and press down with your fingertip until it clicks into place. Don't try to…
16. Install the screen onto the frame
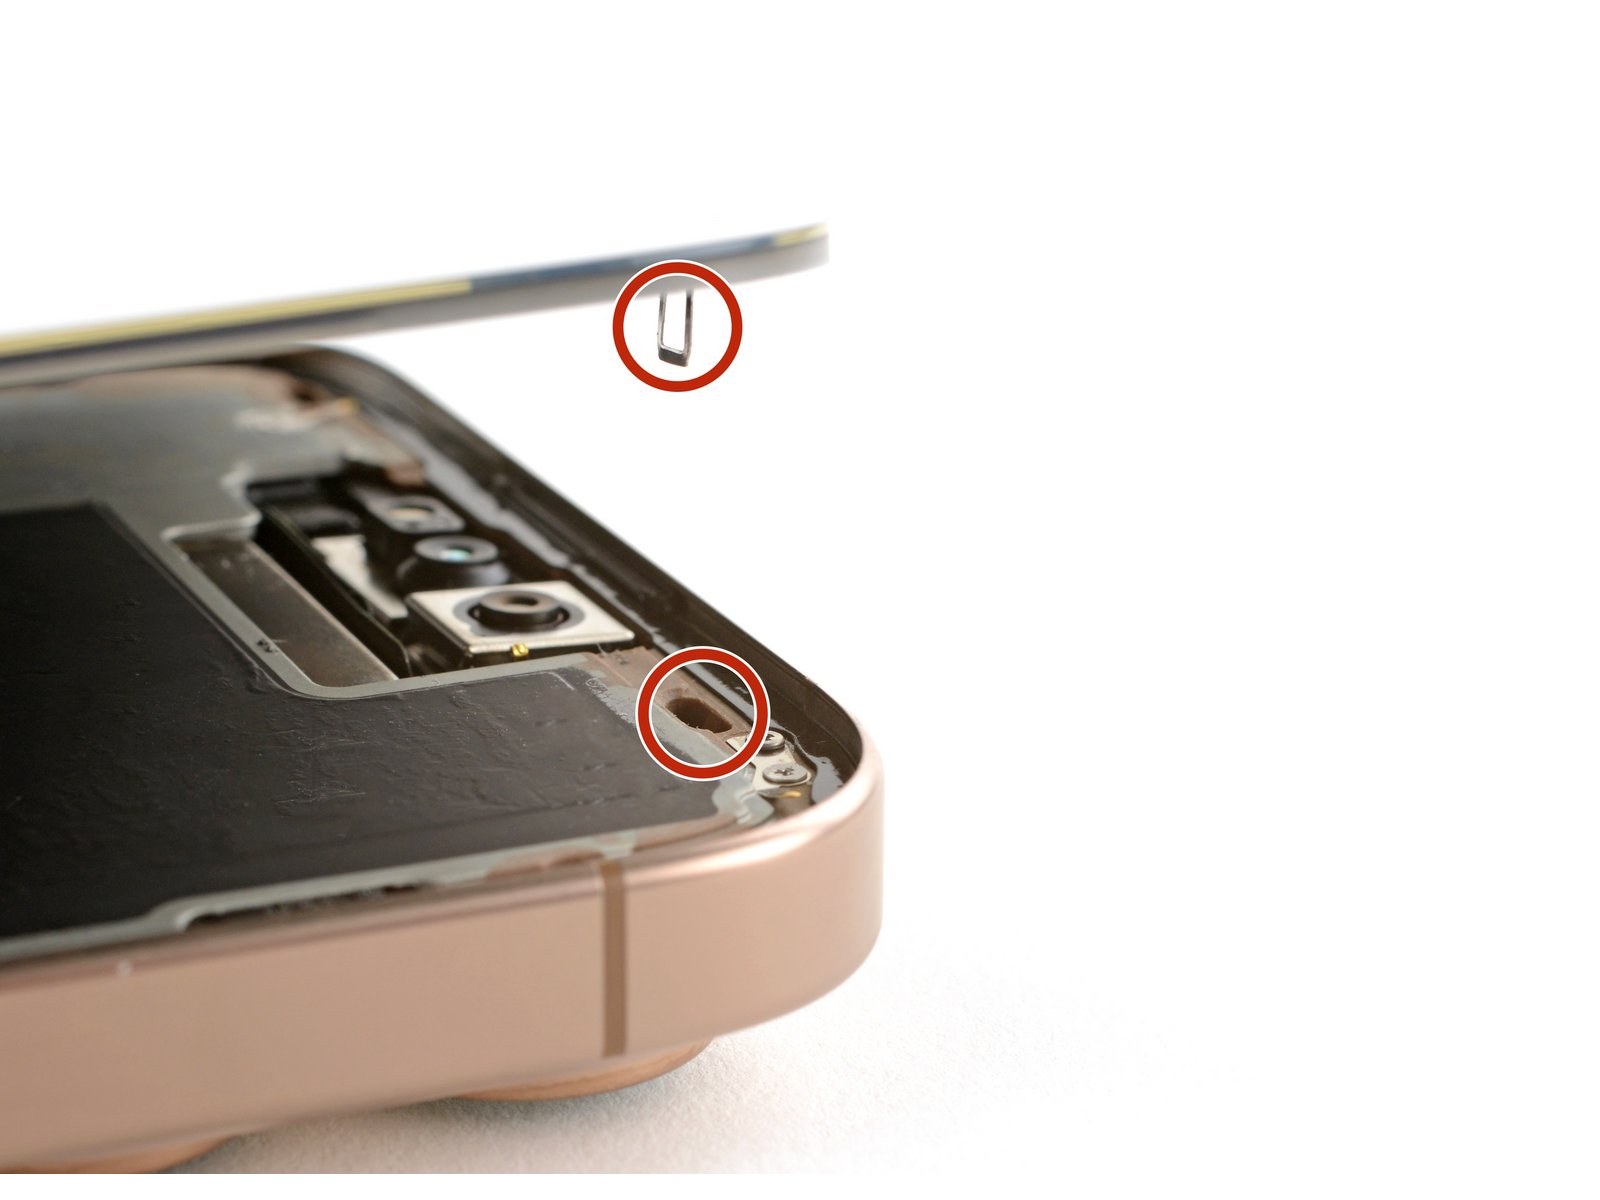
Carefully align the screen's top clips with their frame cutouts.
18. Install the pentalobe screws
Use a P2 pentalobe driver to install the two 7.4 mm-long screws on either side of the charge port.
4) Calibrate & handover
- Power on and check display, touch, True Tone / auto-brightness behaviour, Face ID path, earpiece and cameras.
- For genuine Apple screens: Settings → General → About → Parts & Service History → Restart & Finish Repair (Repair Assistant) when available.
- Explain FIX4U repair warranty (3 months) and return the device cleaned.
Book iPhone 16 Pro Max screen repair · WhatsApp +64 21 885 501 · Rosedale, Auckland